Saturday, May 31, 2014

Day 151: DIY Eye Make-up Remover (success).

Pinterest pin and website link.

I apologize in advance for these creepy close-up eye pictures of me!  But, this homemade eye make-up remover really works -- and it's cheap!

My eyes at the end of the day: 
Eye Makeup Remover Ingredients & Instructions:
1 cup water
1-1/2 tablespoons tear-free baby shampoo
1/8 teaspoon baby oil

Mix ingredients together in a small container.  Shake before every use.

Verdict: SUCCESS!

Friday, May 30, 2014

Day 150: Using Vegetable Glycerin in Homemade Hand Scrub (success).

Pinterest pin and website link.

I have super dry hands in the winter and wanted to try adding vegetable glycerin to the Mary Kay's "Satin Hands" recipe, as suggested by the blog author.  I made the recipe per the pin, and added 1 tablespoon of vegetable glycerin at the end.  I did notice that it didn't dry out my hands as much (a success), but I didn't like how it made the scrub ingredients separate out in the jar (a fail, in my opinion).  This wouldn't look as pretty or be as user-friendly (the receiving person would have to stir the scrub before each use) if giving as a gift.
Verdict: SUCCESS / FAIL.

Thursday, May 29, 2014

Day 149: Honey Whole-Wheat Sandwich Bread (success).

Pinterest pin and website link.
 
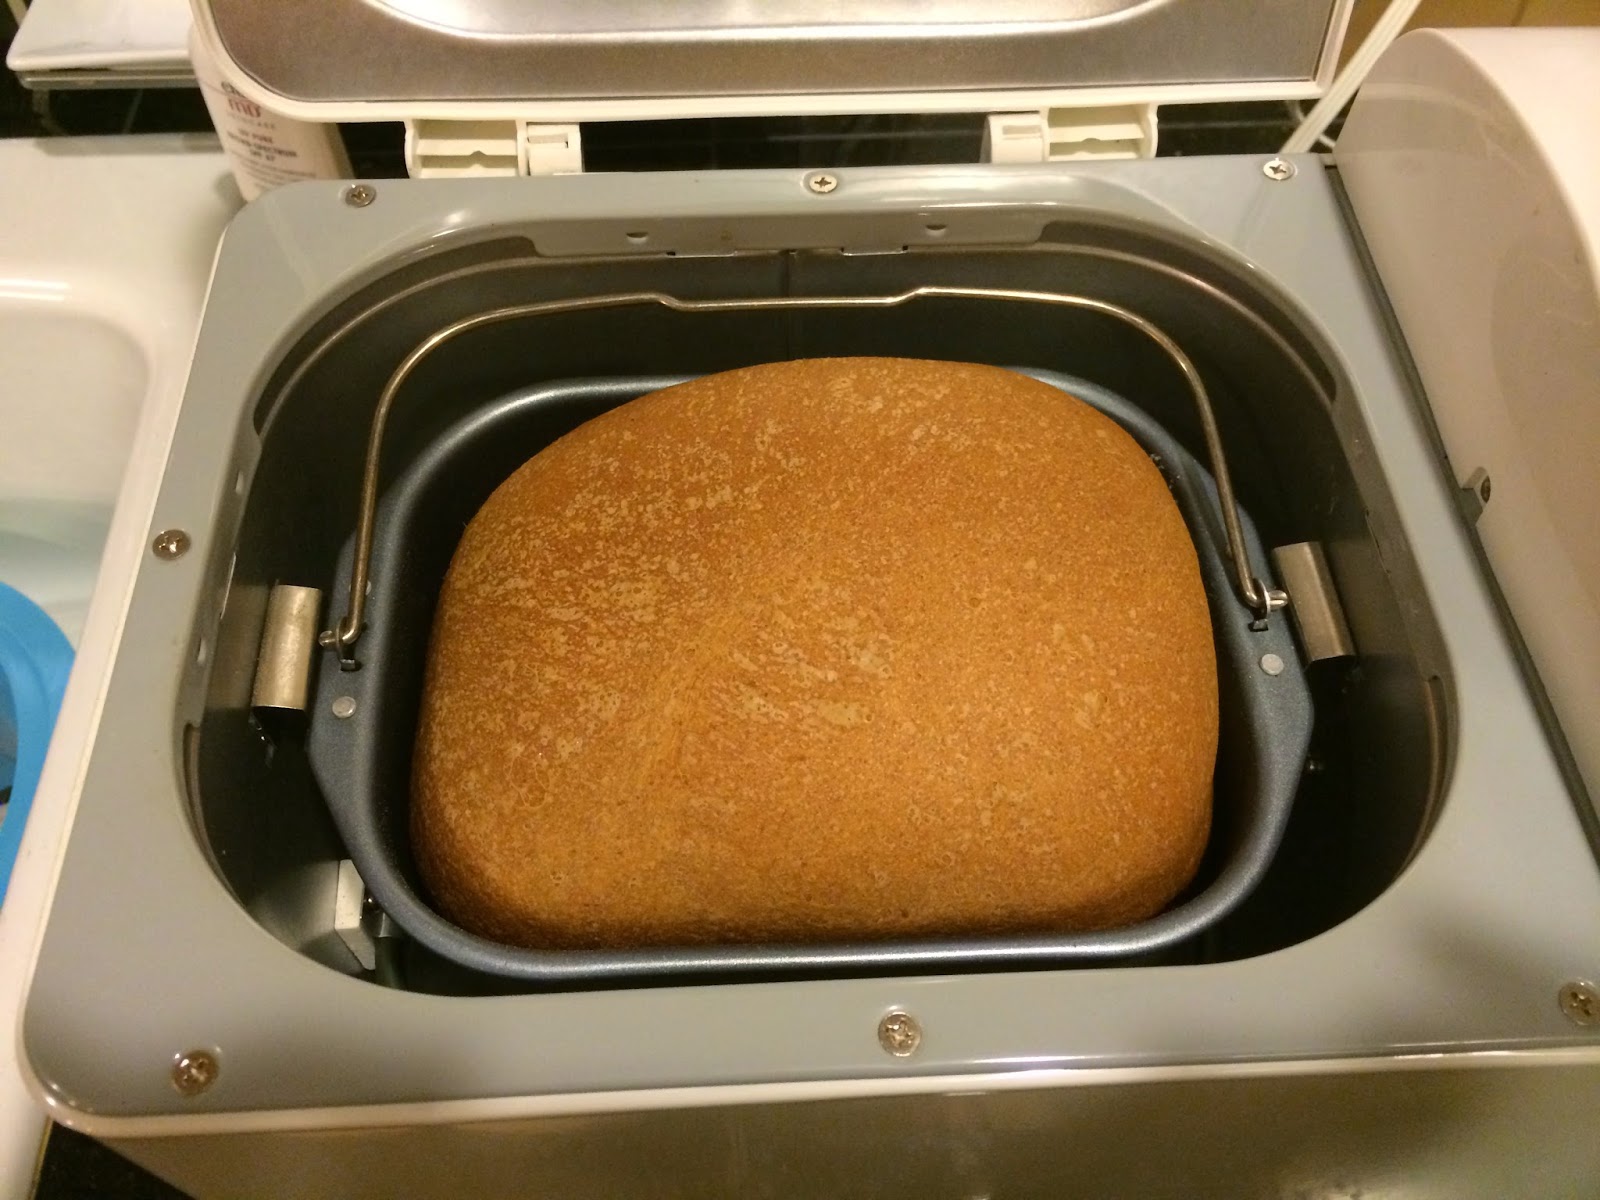
This was the best bread recipe I've made -- my family loved it!  I hesitated to even make this bread because only half of it is done in the bread machine -- but I'm really glad I tried it despite the extra effort it takes!  I actually made one loaf by following the pin exactly (loaf below on the right), and the other loaf completely in the bread machine (loaf below on the left).  Hands down, the one that tasted the best was the one that followed the pin.
Ingredients:
1 3/4 cup warm water (between 110 – 115 degrees)
3 tablespoons butter
1/4 cup honey
1/4 cup molasses
1-1/2 teaspoons salt
2 cups white bread flour
2-1/2 cups wheat flour
1/2 cup
ground flaxseed
2-1/4 teaspoon yeast
 
Directions:
1. Add contents per your bread machine’s manufacturer directions. (Example, wet, dry, yeast.)
2. Turn to dough setting for 1-1/2 hours.
3. Grease two 9-inch loaf pans with cooking spray or vegetable shortening.
3. Once dough cycle is completed, turn dough out on lightly floured surface with oiled hands.
5. Knead slightly and form into to two loaves.
6. Place in prepared loaf pans, cover with cotton towel, and let rise in warm area for 30 minutes or until double in size.
7. Preheat oven to 350 degrees.
8. Place in preheated oven and bake for 25 minutes.
9. Cool in wire rack.
10. Let bread completely cool before slicing and eating to ensure the softest bread.
 
Verdict: SUCCESS!

Wednesday, May 28, 2014

Day 148: Simple Bread Machine Bread (success).

 Pinterest pin and website link.

I am on a mission to use the appliances in my kitchen that I've rarely (or never!) used -- or I'm going to get rid of them!  I'm so happy that I tried out my bread machine.  This was a simple recipe to make and the bread was good!

Ingredients1-1/3 cups warm water, about 110 degrees
2 Tablespoons and 2 teaspoons white sugar
3 teaspoons yeast
1/3 cup olive oil
4 cups flour (I used 1-1/2 cups whole wheat flour and 2-1/2 cups white bread flour)
2 teaspoons salt
 Directions
In a bread machine, place water, oil and salt.  Add flour on top of liquids. Pour sugar into one corner of the bread machine basket. Then make a well in the center of the flour and pour in the yeast. 
 Set your bread machine for "basic" loaf, and let it do the work for you! 

Verdict: SUCCESS!  My family liked this bread, and even though I've found another recipe we like ever better, this one is much easier to do because all the steps are in the bread machine!

Tuesday, May 27, 2014

Day 147: How to Wash & Whiten Yellowed Pillows (fail).

Pinterest pin and website link.

I have a front-loading washer, so I modified this pin based on the comments section below the original post; instead of soaking the pillows in the washing machine, I soaked them in our bathtub. 

A few of our pillows look like this (the sheet underneath is pure white, so you can see just how yellowed the pillow is):
I mixed together the following solution in our bathtub and soaked three pillows (FYI: it didn't say how long to soak them, and I think I may have overdone it, as the lining on two of the pillows started to disintegrate after soaking for 1/2 an hour on each side).

Mixture:
Hot water
1 cup of laundry detergent
1 cup powdered dishwasher detergent
1 cup bleach
1/2 cup borax
I then wrung the pillows out, transferred them to the washer and washed them in hot, hot water for two cycles.  It took 2+ dryer cycles to get them dry, plus lots of work to fluff out all the lumps.  In the end, I ruined two pillows (too lumpy to sleep on anymore and lining is ripped) and the remaining one isn't all that much whiter.  From here on out, I think I'll just run them through the washer -- 2 at a time -- with our regular laundry soap and bleach.  Most people don't see the yellowed pillows anyway with the pillowcases on!
 Verdict: FAIL. 

Monday, May 26, 2014

Day 146: Organizing Lego Instruction Books (success).

Pinterest pin and website link.

My son is just getting into Legos, which means that although we only have a few sets, I'm stepping on tiny Legos everywhere in the house!  I will be looking into Lego storage solutions at some point, but for now, I wanted to try organizing the instruction booklets; the books are already getting torn and ripped from use, and are just thrown in the box with all the Lego pieces.
I took the staples out of the middle of the instruction books and put each page in a plastic page protector before placing in a binder.  My husband thought this was over-kill (he suggested putting the entire booklet in one page protector, as it took A TON of protectors to do the three little sets we have!), but I've already noticed my son is more willing to take apart and re-build his current Legos now that the instructions are easier for him to flip through and see.
For now, this is the system we're using -- I may have to adapt it when he gets more sets with longer instructions!

Verdict: SUCCESS!

Sunday, May 25, 2014

Day 145: Foil-Wrapped Salmon (success).

Pinterest pin and website link.

Ingredients:
Salmon fillet (I purchased the wild salmon from Costco -- and was able to cut it in large pieces before baking and freeze 3/4 of it for future meals)

2 tsp. olive oil (to grease foil)

4 tsp. basil pesto (I used the Costco basil pesto in a jar)

Tomatoes, sliced about 1/4 inch thick

Instructions:
Preheat oven to 450 F.  Place a baking sheet in the oven to heat while you prep the salmon (I didn't do this step, and the salmon was still baked to perfection).

Tear two pieces of foil, big enough to wrap salmon with some overlapping. Place foil pieces one on top of the other. Put about 2 tsp. olive oil in center of top piece of foil and lay salmon on top of oil.

Spread basil pesto over the salmon. Arrange sliced tomatoes over pesto so they cover the top of the salmon.

Wrap salmon securely in foil, doubling over the seam and ends several times. Place salmon packet on heated baking sheet and cook 15 minutes.

Remove from oven after 15 minutes and let sit 2-3 minutes. Then open carefully and serve immediately, while salmon and tomatoes are hot.


Verdict: SUCCESS!