Showing posts with label Dessert. Show all posts

Friday, May 16, 2014

Day 136: Baked Funfetti Donuts (fail).

Pinterest pin and website link.

These were all-around bad :(  Super sugary, too many sprinkles, horrible-tasting glaze.  Just trust me on this one -- don't waste your time.  I'd suggest hitting up Krispy Kreme instead.

I did like the blog author's idea of piping the batter into the donut pan.  
After mixing up the batter (it will be thick), spoon it into a Ziploc bag, snip off a side at the bottom of the bag, and slowly pipe the batter into the pan.  Voila!
Baked, but not yet glazed.  Too many sprinkles!
Glazed -- and the ones on the far left were achieved by following her instructions exactly.  Once I tasted the glaze (too much powdered sugar taste, in my opinion!), I just "dripped" some on the top instead of covering the entire donut.  Neither tasted very good!
Verdict: FAIL.

Wednesday, May 14, 2014

Day 134: Pineapple Whip (fail).

Pinterest pin and website link.

I've never had a Dole Whip at Disneyland before, but this homemade version is supposed to be close to the real deal, and since I like all the ingredients separately, I thought I would give it a try!  Unfortunately, the ingredient combo just wasn't good -- the almond milk and pineapple didn't meld well, and it seemed like there should be more honey included.

Ingredients:
1 fresh pineapple, peeled, cored, chopped and frozen (or, store-bought, frozen pineapple)
1 cup almond milk
1 tablespoon honey

Instructions:
The blog author suggested using a Vitamix or food processor versus a blender to get an ice cream-like consistency.  I used the food processor attachment on top of my blender and halved the recipe.
Combine the frozen pineapple with the almond milk and honey, and blend until smooth (this took awhile for me).  The full recipe makes 4-6 servings.  Serve immediately.
Verdict: FAIL (due to taste).

Saturday, May 10, 2014

Day 130: Storing Ice Cream in a Ziploc to Keep Soft (fail).

Pinterest pin and website link.

To perform my own test on this pin, I "splurged" and bought two containers of ice cream at the store last week.  I stored one container of ice cream (strawberry) in the freezer without a Ziploc bag, and one container (chocolate chip cookie dough) in the freezer with a Ziploc bag.  I saw no difference in softness when I was scooping them out tonight after a few days of sitting in the freezer.  My opinion?  Save your plastic bags and just put the container straight into the freezer!
Verdict: FAIL.

Thursday, May 8, 2014

Day 128: Freezing Cupcakes (works -- but a fail).

Pinterest pin and website link.

I typically bake cupcakes days / weeks in advance of when I need them and freeze them to keep; I then frost them while frozen.  I decided to try a new method of freezing cupcakes versus my typical way (throwing baked, cooled cupcakes into a Ziploc bag).  In the end, it was much more work, and didn't seem to make much -- if any -- difference in the final taste or texture.  Below, you can see that I froze some cupcakes in my traditional way, and then more cupcakes in the new way with saran wrap + foil + Ziploc bag.
Instructions:
Step 1: After baking the cupcakes, let them cool a bit; once they are cool, they can be wrapped. Lay large pieces of saran wrap in an X and then place 12 cupcakes in the center. Fold in one side and then the other, creating a nice seal.


Step 2: Lay out a long piece of foil and place cupcakes in center. Wrap foil around and fold sides in.
Step 3: Slip into a gallon Ziploc, and label with date and flavor.
The true test was when I ate these -- I was worried about my "traditional" packaging, as these cupcakes looked like they had a little freezer burn...

...and the ones with the new packaging weren't iced over at all.
However, I frosted both (while frozen), let them defrost, and then taste-tested, and they tasted exactly the same.  My vote?  It's not worth the extra effort + materials to use saran wrap and foil. 

Verdict: FAIL

Monday, May 5, 2014

Day 125: Chocolate Fudge Cupcakes (fail).

Pinterest pin and website link.

Continuing my project to test how different boxed cakes (besides white or vanilla) taste when using the trick for making boxed cupcakes taste like bakery cupcakes, I attempted a chocolate fudge mix tonight.  For this attempt, I used Betty Crocker's Chocolate Fudge cake mix and eliminated the vanilla (due to my spice cupcake trial with additional vanilla flavoring).  These tasted okay -- but definitely lacked a rich, chocolate fudge flavor, likely due to all the extra ingredients (an additional egg and more butter).  In the future, I would make these according to the package directions.
Verdict: FAIL.

Saturday, May 3, 2014

Day 123: Snickerdoodle Cake Pop (fail).

Pinterest pin and website link.

These did not taste good, mainly because the consistency was weird and squishy :(

Ingredients:
Yellow cake mix (baked according to box instructions)
Canned vanilla frosting (mine happened to be "hot pink vanilla!")
3/4 cup granulated sugar
3 tbsp ground cinnamon
lollipop sticks
Instructions:
Once cake has cooled, crumble it into fine pieces in a large bowl. Add 2 spoonfuls of frosting, incorporating it into the cake using your fingers (this looked like play dough to me...).
Once the frosting is evenly distributed, use a cookie scoop to make evenly-sized portions. Roll and shape the cake into balls.  In a small bowl, combine sugar and cinnamon. Coat the cake balls in the cinnamon-sugar mixture. Serve as is, or add lollipop sticks to make cake pops.

This was my son's face prior to trying the cake pops...
Verdict: FAIL.

Saturday, April 26, 2014

Day 116: Jello Shaved Ice (success).

Pinterest pin and website link.

My kids loved helping me make this, and could barely contain their excitement for the 4+ hours it took to solidify before eating :)

Ingredients:
1 cup boiling water
2 cups Sprite or 7-Up
1 (4-ounce serving) package of Jello, any flavor

Instructions:
In an 8x8 glass pan, whisk the Jello package contents into the boiling water until dissolved.  Carefully stir in the soda (having a cute boy in charge of whisking is optional).
Freeze for at least 4 hours (I would suggest longer -- our batch was like shaved ice at the top and jello at the bottom after 4 hours, but after 6, was like shaved ice throughout).  Use an ice cream scoop to shave the ice.  Serve immediately.
Verdict: SUCCESS!

Tuesday, April 1, 2014

Day 91: Ice Cream Cone Cupcakes (success).

Pinterest pin and website link.

Happy April Fool's Day!  My husband had a company potluck today and asked me to make an April Fool's Day-themed dessert.  I've been wanting an excuse to try making cupcakes inside an ice cream cone, and this was the perfect opportunity -- and he told me they went over really well!

Ingredients / Materials Needed:
24 flat-bottom ice cream cones
Miniature muffin tin
Funfetti (or flavor of your choice) cake mix
Frosting & powdered sugar (explained below)
Piping bag / container and "star" tip
Large, sturdy box

Instructions:
Fill cones halfway (mine were a little full).
Bake in the oven as directed on the cake box for cupcakes (mine specified to bake at 350 degrees for 19-22 minutes).
Let cool, frost and enjoy!  My friend gave me a tip on frosting these like ice cream cones -- I put an entire jar of Betty Crocker's butter cream frosting into my KitchenAid mixer, and added 1/2 cup of powdered sugar.  I then mixed the two ingredients together, which stiffened the frosting enough to hold the ice cream shape.  Using a piping bag and a star tip, I started on the edge of the cupcake, and swirled around and in toward the center, using steady pressure.   
Finally, my husband needed a way to transport these to work, so we used an empty "Our Generation" doll box from Target and cut squares in the back to put the completed ice cream cone cupcakes in.  I hope he brings it home so that I can make / transport more of these!
Verdict: SUCCESS!

Monday, March 31, 2014

Day 90: DIY Cookie Basket Made from a Paper Plate (success).

Pinterest pin and website link.

This is so cool -- using just a paper plate, you can make a basket to hold cookies / desserts for gifting.  This solves a big problem for me, as I have an issue transporting dessert items I make specifically for this blog to my family / friends before I eat them all myself.  This pin is saving my waistline :)

I'll let the original blogger's picture showcase how to do it...
Inexpensive, easy to make, and a crowd pleaser -- my friend liked both the basket and these circus animal truffles I dropped on her doorstep!
Verdict: SUCCESS!

Friday, March 28, 2014

Day 87: Circus Animal Truffles (success).

Pinterest pin and website link.

Growing up, my Grandma always had these circus animal cookies at her house, so I had sentimental reasons for wanting to make these truffles.

Ingredients:
12-oz package of frosted animal cracker cookies
4 oz of cream cheese
4 squares of vanilla bark

Instructions:
In a food processor or blender, blend the circus animals down into crumbs (it was easier for me to do this in two batches).  Then, mix the cream cheese and cookie crumbs together in a bowl until well-mixed (this took lots of mixing and I wasn't sure that there was enough cream cheese.  Trust me -- there was enought, but I had to use my hands to get the mixture into a ball shape). Mold the mixture into 1-inch size balls, and place them on a wax paper-covered baking sheet. Place the baking sheet in the fridge for about 30 minutes, at which point the balls will be easier to dip in the white chocolate and not fall apart.
Once the the truffles are hardened, melt the vanilla bark in the microwave. Heat the squares for 30 seconds at a time, stirring in between each heat burst and repeating until all the chocolate is melted.  Roll each ball in the melted chocolate until it is fully covered. I used two forks to push the truffle around in the chocolate. Then, using the two forks, carefully pick up the truffle and allow the excess chocolate to run off before placing back on the wax paper. Repeat with all the truffles. 
These were really tasty -- and I must say, looked pretty cute in this makeshift container that I brought to a friend.  Click here for instructions on how to make a regular paper plate into this dessert container!
Verdict: SUCCESS!

Saturday, March 22, 2014

Day 81: Funfetti Cake Cookies (success).

Pinterest pin and website link.

I've had a love affair with Funfetti cake since college, so I'm surprising even myself when I say I liked these Funfetti cookies even more than the original cake!  They were simple to make, much easier to eat (and transport to one of my most favorite people, who just happened to introduce me to the Funfetti cake mixes years ago), took less time to bake, and didn't have tons of frosting covering it (like a cake does).  These Funfetti sandwich cookies may be my new go-to birthday treat!

Ingredients:
1 package of Pillsbury Funfetti Cake Mix
1/4 cup canola oil
2 eggs
1 can of frosting
Instructions:
Preheat oven to 375 degrees.  Stir together dry cake mix, oil and eggs.  With hands, roll dough into 1-inch balls before placing them on a cookie sheet.  Flatten slightly with the palm of your hand (I found this more successful than the bottom of a drinking glass, as she suggested).
Bake for 6-7 minutes, or until the edges are golden brown.  Cool for a few minutes on the cookie sheet, remove to cooling racks, and frost (I chose to make sandwich cookies for easy transporting).  Let frosting and cookies cool completely before storing.
 Verdict: SUCCESS!

Wednesday, March 12, 2014

Day 71: Key Lime Cupcakes (success).

Pinterest pin and website link.

Ingredients:
  • 1 small box instant Lime Jello
  • two regular limes, zest and juice
  • vanilla frosting (I couldn't find the Pillsbury Key Lime frosting she mentioned -- but if you can find it, that would make these even better!)

Instructions:
Preheat oven to 350 degrees.  In your mixing bowl, prepare white cake mix (either from box directions or how to make a boxed cupcake taste like a bakery cupcake -- I opted for the latter).  Using your electric mixer, beat in your box of lime Jello, 1 tablespoon of lime zest and 2 tablespoons of lime juice.  Fill lined muffin tins 3/4 full.  Bake 22-25 minutes, or until toothpick inserted in the middle comes out clean.  Let cupcakes cool 5 minutes in muffin tin before removing them to a wire rack to finish cooling.  Once cupcakes are cooled, frost each cupcake with vanilla frosting.
Verdict: SUCCESS!  Although lime isn't my favorite cupcake flavor, these are fun to add a little green to your St. Patrick's Day.  Just a side-note: when I made these with the additional ingredients, I noticed that they pulled away from the liners, which hasn't happened to me before -- I just unwrapped most of them before bringing them to my official "cupcake tester" to try!

Saturday, March 8, 2014

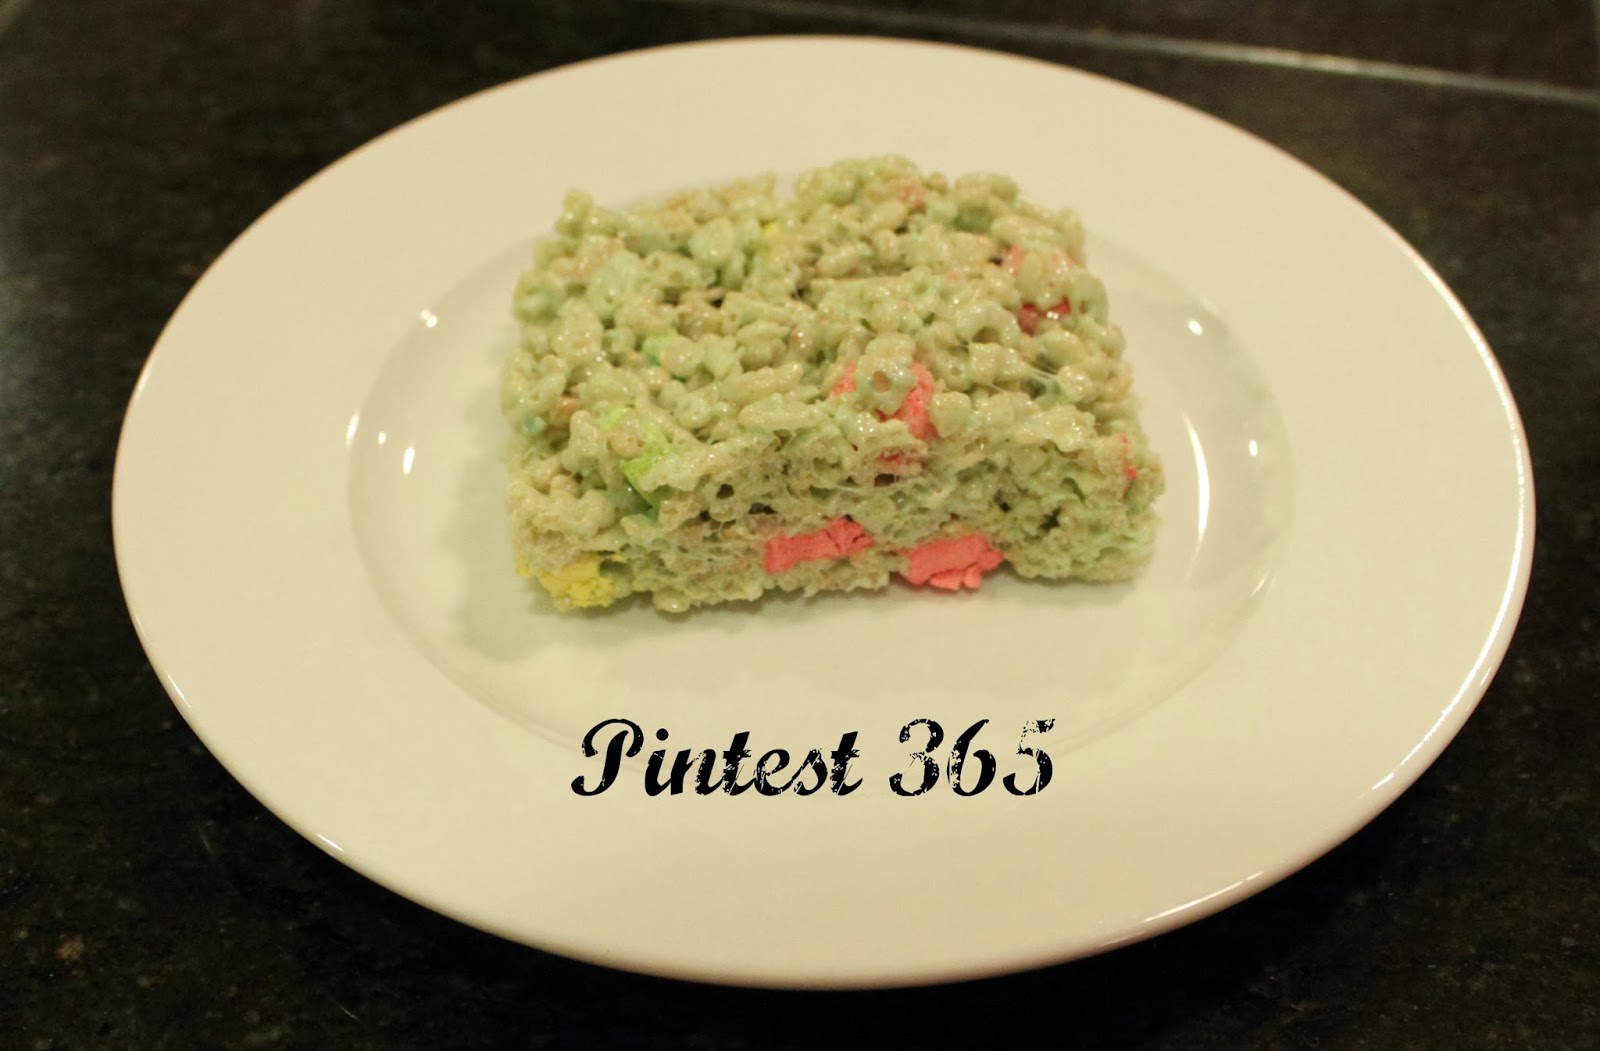
Day 67: St. Patrick's Day Rice Krispies Treats (success).

Pinterest pin and website link.

My kids seem to like that I'm prepping a few St. Patrick's Day desserts early, as they get to taste test -- these were a huge hit and were super easy to prepare!

Ingredients:
* 1/4 cup of butter
* 4 cups of soft marshmallows
* 5 cups of Rice Krispies cereal
* 1/2 teaspoon of vanilla extract
* green food coloring (I used 6 drops)
* 3/4 cup Lucky Charms marshmallows
My tip:
Give your kids the job of picking the marshmallows out of the Lucky Charms cereal. Mine loved this job because they could sneak in some marshmallow eating; I loved it because I didn't have to do it!
Instructions:
Melt butter over low heat until completely melted. Gradually add marshmallows and stir often to avoid burning. When marshmallow / butter mixture is completely melted, add vanilla and green food coloring and mix well. Remove from heat and stir in the Rice Krispies cereal. Once mixture is mostly combined, stir in the Lucky Charms marshmallows.   
Verdict: SUCCESS

Friday, March 7, 2014

Day 66: Copycat McDonald's Shamrock Shake (success).

Pinterest pin and website link.

I fully expected for this homemade concoction to fail, as I am an extremely loyal patron of McDonald's during the month of March only -- I go just for their Shamrock Shakes!  However, my whole family was pleasantly surprised and said that this tasted almost identical to the real thing; my husband even said these were better!

Ingredients:
3 cups vanilla ice cream
1 cup whole milk (I only had 1/2 & 1/2 and 2% -- so I mixed them!)
1/2 teaspoon pure peppermint extract
1/4 teaspoon green food color
Whipped cream (optional)
Green sprinkles (optional)
Directions:
Place ice cream, milk, peppermint extract and green food coloring in a blender.  Cover and blend until smooth.  Pour into glasses, and top with whipped cream and sprinkles, if wanted.  Serve immediately.
Verdict: SUCCESS!

Monday, March 3, 2014

Day 62: Spice Cake Cupcakes (success).

Pinterest pin and website link.

I have wanted to try how other boxed cakes (besides white or vanilla) taste when using the trick for making boxed cupcakes taste like bakery cupcakes.  For my first attempt, I tried a spice cake made into cupcakes.  Although it tasted delicious, my official cupcake tester (and good friend!) noted that it didn't taste as much like a spice cake/cupcake as it should have -- and she was thinking that was because of the added vanilla.  I think I will omit the vanilla in future cupcake tests.  I also found that these were more difficult to frost than the white or vanilla boxed cupcakes had been, and if I make them again, I will freeze them after baking, and then frost them before they thaw.
Verdict: success (in terms of taste!).

Thursday, February 13, 2014

Day 44: Cheesecake Mousse (fail).

Pinterest pin and website link.

I was excited to try this out as an early Valentine's Day treat -- but I'm glad I didn't surprise the kids with this on actual Valentine's Day.  It would not have gone over well, and they would have been disappointed :(

Ingredients:
1 package (8 oz.) cream cheese
1/2 cup powdered sugar
1/4 cup milk or cream
1 teaspoon vanilla
1 small container (8 oz.) Cool Whip, thawed
red food color (I used more for the red color and less to make pink)
candy corn (for garnish)
Directions (from website link above):
Beat cream cheese in the bowl of an electric mixer until fully smooth.  Slowly add powdered sugar, then milk (or cream).  Add vanilla.  Continue mixing.  Beat about 1 minute on medium to medium-high speed.  Fold cool whip into cream cheese mixture, and stir until fully combined.
Scoop about 1/3 of the Cheesecake Mousse into a bowl, and color red.  Color another third of the mixture pink.  Leave the remaining third white.  One color at a time (starting with red), scoop mixture into a piping bag or large Ziploc bag, and squeeze a layer of the Cheesecake Mousse into small dessert dishes of your choice.  Repeat with pink and then white Mousse.
Refrigerate 30 minutes (or up to 1 day) before serving.  Garnish with candy corn if desired.
Verdict?  It was a presentation fail (ours looked nothing like the pinned picture; it was really difficult to squeeze the mousse into the glasses while making it look presentable!), plus the actual mousse taste wasn't a big hit.  My kids love dessert and didn't like it much -- and my husband didn't even want to try it. 

Friday, February 7, 2014

Day 38: Pre-Scooped Ice Cream (success).

Pinterest pin and website link.

This is going to make the person who scoops ice cream at your parties / events so, so happy.  I seem to be the designated ice cream scooper in my house, and always feel rushed and panicky while trying to get the cake and ice cream on the table for our not-so-patient small guests (my kids -- and their friends -- are 2 and 4!). 


This pin worked like a charm -- simply scoop the ice cream into lined muffin tins and put back into the freezer until the party goers are ready for cake.  Then, you can either serve it in the muffin liners or drop it onto a plate.

We tested this out for dessert last night, and the pre-scooped ice cream had been in the freezer for 3 hours.  The scoops tasted great and didn't have any freezer burn, but I wouldn't leave them in there for much longer than that without covering them.

Verdict: success!

Monday, February 3, 2014

Day 34: Marbled Cupcakes (success).

Pinterest pin and website link.

I used the trick for making boxed cupcakes taste like bakery cupcakes -- and they were a hit again!

Divide the batter evenly and tint one half of it a different color of your choice.
The blog author has different amounts of each batter she puts in, but I did the following measurements: 1 tablespoon green, 1 tablespoon white on top, and 1 tablespoon green on top of that.  Then, use a toothpick to "swirl" the colors together to get a marbled look.
 Pre-frosting.
All ready for our Seahawks Superbowl party!  Obviously, these cupcakes are the reason they won!
Verdict: success!