Saturday, May 31, 2014

Day 151: DIY Eye Make-up Remover (success).

Pinterest pin and website link.

I apologize in advance for these creepy close-up eye pictures of me!  But, this homemade eye make-up remover really works -- and it's cheap!

My eyes at the end of the day: 
Eye Makeup Remover Ingredients & Instructions:
1 cup water
1-1/2 tablespoons tear-free baby shampoo
1/8 teaspoon baby oil

Mix ingredients together in a small container.  Shake before every use.

Verdict: SUCCESS!

Friday, May 30, 2014

Day 150: Using Vegetable Glycerin in Homemade Hand Scrub (success).

Pinterest pin and website link.

I have super dry hands in the winter and wanted to try adding vegetable glycerin to the Mary Kay's "Satin Hands" recipe, as suggested by the blog author.  I made the recipe per the pin, and added 1 tablespoon of vegetable glycerin at the end.  I did notice that it didn't dry out my hands as much (a success), but I didn't like how it made the scrub ingredients separate out in the jar (a fail, in my opinion).  This wouldn't look as pretty or be as user-friendly (the receiving person would have to stir the scrub before each use) if giving as a gift.
Verdict: SUCCESS / FAIL.

Thursday, May 29, 2014

Day 149: Honey Whole-Wheat Sandwich Bread (success).

Pinterest pin and website link.
 
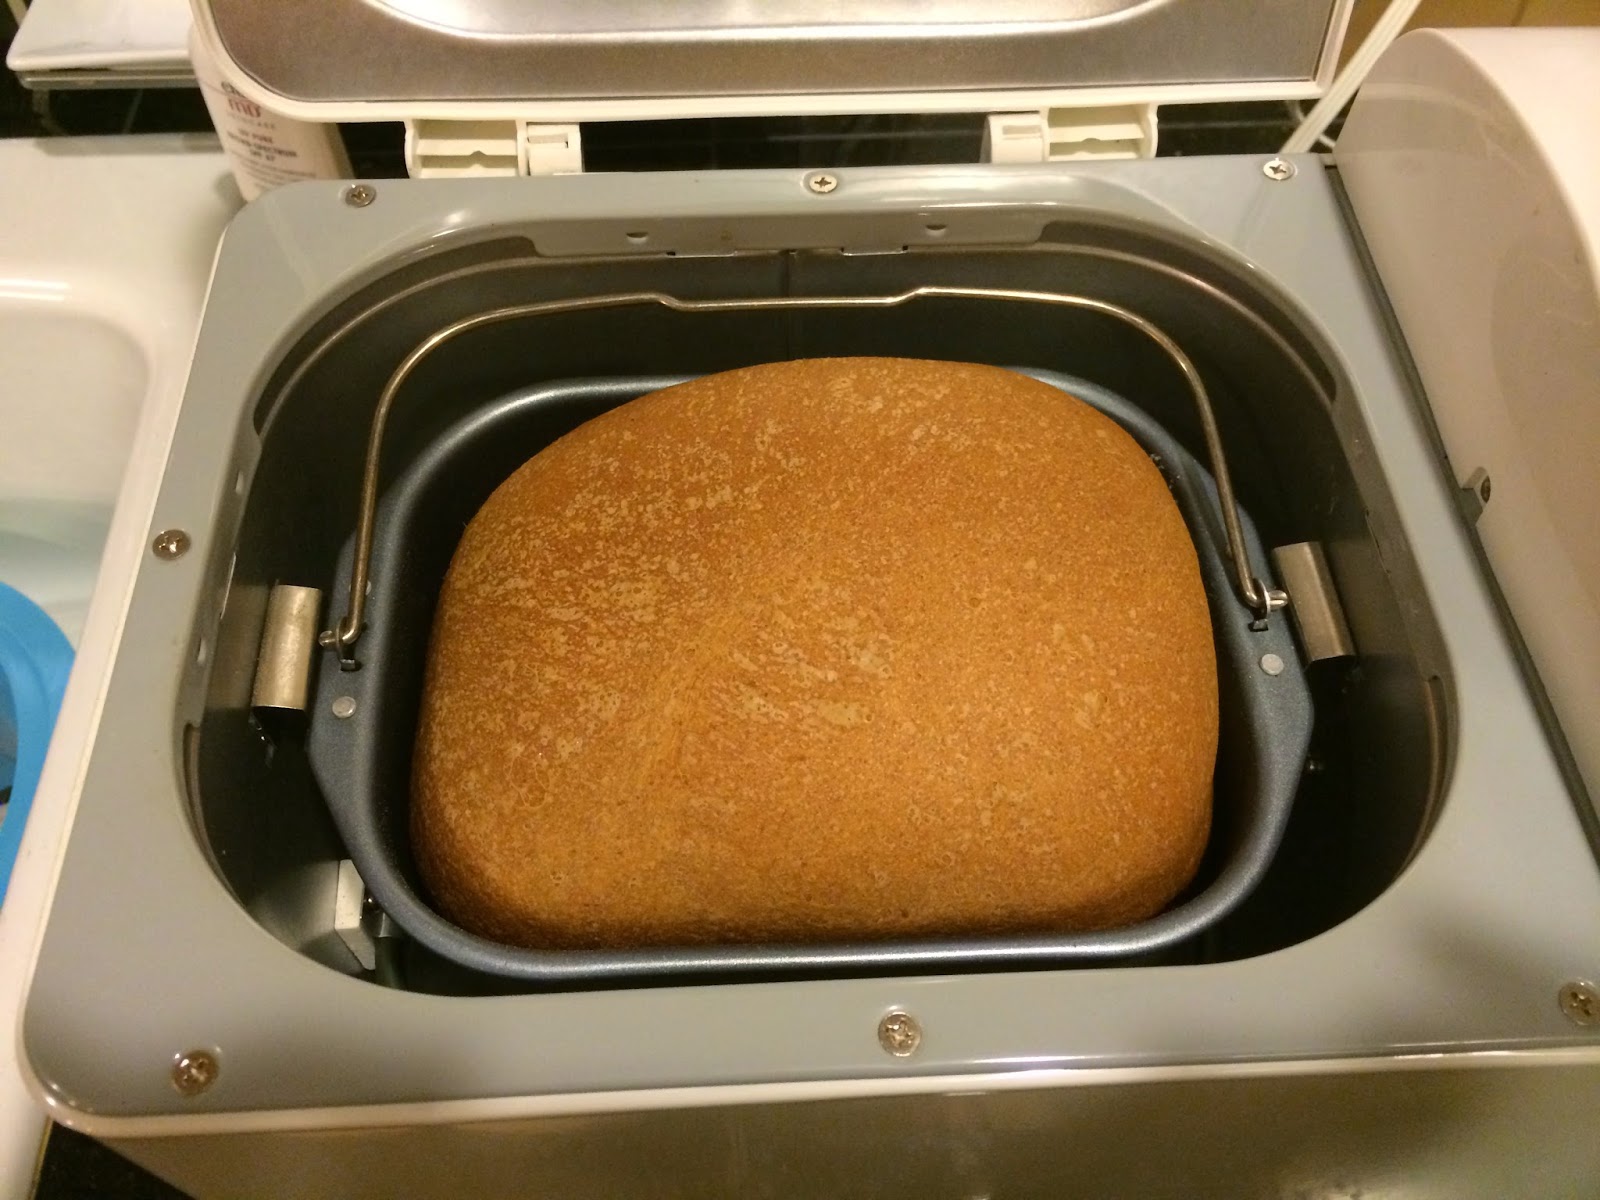
This was the best bread recipe I've made -- my family loved it!  I hesitated to even make this bread because only half of it is done in the bread machine -- but I'm really glad I tried it despite the extra effort it takes!  I actually made one loaf by following the pin exactly (loaf below on the right), and the other loaf completely in the bread machine (loaf below on the left).  Hands down, the one that tasted the best was the one that followed the pin.
Ingredients:
1 3/4 cup warm water (between 110 – 115 degrees)
3 tablespoons butter
1/4 cup honey
1/4 cup molasses
1-1/2 teaspoons salt
2 cups white bread flour
2-1/2 cups wheat flour
1/2 cup
ground flaxseed
2-1/4 teaspoon yeast
 
Directions:
1. Add contents per your bread machine’s manufacturer directions. (Example, wet, dry, yeast.)
2. Turn to dough setting for 1-1/2 hours.
3. Grease two 9-inch loaf pans with cooking spray or vegetable shortening.
3. Once dough cycle is completed, turn dough out on lightly floured surface with oiled hands.
5. Knead slightly and form into to two loaves.
6. Place in prepared loaf pans, cover with cotton towel, and let rise in warm area for 30 minutes or until double in size.
7. Preheat oven to 350 degrees.
8. Place in preheated oven and bake for 25 minutes.
9. Cool in wire rack.
10. Let bread completely cool before slicing and eating to ensure the softest bread.
 
Verdict: SUCCESS!

Wednesday, May 28, 2014

Day 148: Simple Bread Machine Bread (success).

 Pinterest pin and website link.

I am on a mission to use the appliances in my kitchen that I've rarely (or never!) used -- or I'm going to get rid of them!  I'm so happy that I tried out my bread machine.  This was a simple recipe to make and the bread was good!

Ingredients1-1/3 cups warm water, about 110 degrees
2 Tablespoons and 2 teaspoons white sugar
3 teaspoons yeast
1/3 cup olive oil
4 cups flour (I used 1-1/2 cups whole wheat flour and 2-1/2 cups white bread flour)
2 teaspoons salt
 Directions
In a bread machine, place water, oil and salt.  Add flour on top of liquids. Pour sugar into one corner of the bread machine basket. Then make a well in the center of the flour and pour in the yeast. 
 Set your bread machine for "basic" loaf, and let it do the work for you! 

Verdict: SUCCESS!  My family liked this bread, and even though I've found another recipe we like ever better, this one is much easier to do because all the steps are in the bread machine!

Tuesday, May 27, 2014

Day 147: How to Wash & Whiten Yellowed Pillows (fail).

Pinterest pin and website link.

I have a front-loading washer, so I modified this pin based on the comments section below the original post; instead of soaking the pillows in the washing machine, I soaked them in our bathtub. 

A few of our pillows look like this (the sheet underneath is pure white, so you can see just how yellowed the pillow is):
I mixed together the following solution in our bathtub and soaked three pillows (FYI: it didn't say how long to soak them, and I think I may have overdone it, as the lining on two of the pillows started to disintegrate after soaking for 1/2 an hour on each side).

Mixture:
Hot water
1 cup of laundry detergent
1 cup powdered dishwasher detergent
1 cup bleach
1/2 cup borax
I then wrung the pillows out, transferred them to the washer and washed them in hot, hot water for two cycles.  It took 2+ dryer cycles to get them dry, plus lots of work to fluff out all the lumps.  In the end, I ruined two pillows (too lumpy to sleep on anymore and lining is ripped) and the remaining one isn't all that much whiter.  From here on out, I think I'll just run them through the washer -- 2 at a time -- with our regular laundry soap and bleach.  Most people don't see the yellowed pillows anyway with the pillowcases on!
 Verdict: FAIL. 

Monday, May 26, 2014

Day 146: Organizing Lego Instruction Books (success).

Pinterest pin and website link.

My son is just getting into Legos, which means that although we only have a few sets, I'm stepping on tiny Legos everywhere in the house!  I will be looking into Lego storage solutions at some point, but for now, I wanted to try organizing the instruction booklets; the books are already getting torn and ripped from use, and are just thrown in the box with all the Lego pieces.
I took the staples out of the middle of the instruction books and put each page in a plastic page protector before placing in a binder.  My husband thought this was over-kill (he suggested putting the entire booklet in one page protector, as it took A TON of protectors to do the three little sets we have!), but I've already noticed my son is more willing to take apart and re-build his current Legos now that the instructions are easier for him to flip through and see.
For now, this is the system we're using -- I may have to adapt it when he gets more sets with longer instructions!

Verdict: SUCCESS!

Sunday, May 25, 2014

Day 145: Foil-Wrapped Salmon (success).

Pinterest pin and website link.

Ingredients:
Salmon fillet (I purchased the wild salmon from Costco -- and was able to cut it in large pieces before baking and freeze 3/4 of it for future meals)

2 tsp. olive oil (to grease foil)

4 tsp. basil pesto (I used the Costco basil pesto in a jar)

Tomatoes, sliced about 1/4 inch thick

Instructions:
Preheat oven to 450 F.  Place a baking sheet in the oven to heat while you prep the salmon (I didn't do this step, and the salmon was still baked to perfection).

Tear two pieces of foil, big enough to wrap salmon with some overlapping. Place foil pieces one on top of the other. Put about 2 tsp. olive oil in center of top piece of foil and lay salmon on top of oil.

Spread basil pesto over the salmon. Arrange sliced tomatoes over pesto so they cover the top of the salmon.

Wrap salmon securely in foil, doubling over the seam and ends several times. Place salmon packet on heated baking sheet and cook 15 minutes.

Remove from oven after 15 minutes and let sit 2-3 minutes. Then open carefully and serve immediately, while salmon and tomatoes are hot.


Verdict: SUCCESS!

Saturday, May 24, 2014

Day 144: Vinegar to Clean Dishwasher (fail).

Pinterest pin and website link.

To be honest, I've never inspected the bottom of my dishwasher to make sure that it's clean, as I assumed that since it gets my dishes clean, the actual machine would be clean too.  Wrong.  It's really gross in there:
In an attempt to clean it, I poured vinegar into the bottom of the empty dishwasher and ran a hot cycle without any dishes, per the pin instructions.  I'm still on the hunt for a way to clean my dishwasher, as mine is still really disgusting:
Verdict: FAIL.

Friday, May 23, 2014

Day 143: Using a Dustpan to Fill a Large Container (fail).

Pinterest pin and website picture.

Depending on the size / depth of your sinks, this could actually work as pictured.  However, when I tried this at home, I discovered that my sinks are much too deep for this to work.  As you can see below, for the dustpan to drain down into the cooler, it has to hang over the edge of the sink; the faucet, however, is nowhere close to being able to drip water into the dustpan.  When I pulled the detachable faucet over to the dustpan and poured water into it, the water went into the cooler.  It didn't make sense to use this pin, though, in that situation -- I could just have squirted water directly from the detachable faucet into the cooler and skipped the dustpan step!
Verdict: FAIL.

Thursday, May 22, 2014

Day 142: Using Baking Soda to Exfoliate (success).

Pinterest pin and website link.

Through this pin-a-day journey I'm on, I've discovered that the most versatile item in my house is baking soda.  It feels like it can -- and should! -- be used for everything!  About two months ago, I decided to attempt using baking soda as a facial exfoliate, and it has worked great!  I decided to spare you a close-up photo of my face, and instead explain just how different my face feels :)

Instructions:
Wet your face (I use a washcloth).  Pump a quarter-sized dollop of facial cleanser into the palm of your hand (as you can see, my true Costco loyalty extends even to my facial cleanser!).  Pour about a teaspoon of baking soda into your hand and mix well to combine with the facial cleanser.  Using a circular motion, massage the mixture onto the skin for 30 seconds to remove dirt, oil and dead skin, particularly around the nose, chin and forehead.  Rinse the baking soda scrub away (this is my only complaint with the baking soda scrub -- I try to carefully wash it away with a washcloth, but this step can be a bit irritating to my skin.  It takes a few times of wiping my face and rinsing out the washcloth before the gritty baking soda is completely removed from my face).  Repeat once a week.
I've tried other exfoliating treatments in the past, and my skin has never felt this smooth.  Try it!

Verdict: SUCCESS!

Wednesday, May 21, 2014

Day 141: Life Hack -- How to Re-Open a Closed Computer Tab (success).

Pinterest pin and website link.

This seemed like a silly thing to test and then blog about, but since trying it recently, I realize how often I do accidentally close a tab that I need / want to get back to while working on my computer!  I thought it was worth passing along that this works!
Verdict: SUCCESS!

Tuesday, May 20, 2014

Day 140: Ribbon Storage (success).

Pinterest pin and website link.

This was so easy to make using a swinging pant hanger.  I have a closest in my office, but no hanging clothing rack inside, so I just hang this over the closet doorknob and my ribbon is ready to go!  The only thing that is kind of annoying is that ribbon spools are oftentimes too big to stack the ribbon on top of each other (thus, the staggered ribbon placement).  As a bonus, I also included tape on here, so I always know where that is while wrapping presents.
Verdict:: SUCCESS!

Monday, May 19, 2014

Day 139: Scratch-Off Chore Card (fail).

Pinterest pin and website link.

I am so bummed this didn't work out!  I had such high hopes that my kids would love to do their chores (ha!) with this scratch-off chore card, but it was not worth the effort / frustration to make the cards and then was super messy while the kids were scratching off the paint.


Materials:
* tempera paint (darker colors are better)
* dishwashing soap
chore card template
* paint brushes
* craft punch (or scissors)
* contact paper

Instructions:
Add a little soap to your paint and mix together.  Use the paint / soap combination to paint onto the contact paper.  Let dry and repeat again; do several coats so you can't see through the paint.  
While the paint is drying, print out chore cards with the template above, or create your own.
When the paint is fully dry, use a craft punch to cut circles from the painted contact paper.  This step was disastrous for me -- my contact paper kept getting stuck in my craft punch and paint flecks were everywhere.
Peel off the back of the contact paper and adhere one painted circle on top of each chore.  As you can see, peeling off the back resulted in even more flaking of the paint.  Plus, even with 3 coats of paint, the chores could be seen through the painted contact paper on my daughter's pink chore card.
Give each child his/her own chore card and a shiny coin, and start cleaning -- or not.  My son figured out that the cleanest way to see the chore was to peel off the painted contact paper.
Getting the hang of scratching off the paint -- which involved lots of paint chip clean-up afterwards and a frustrated 4 year old (and Mom)!
Verdict: FAIL.

Sunday, May 18, 2014

Day 138: Marble Run Water Play (fail -- although fun).

Pinterest pin and website link.

This looked so fun, but ended up not working out so well -- we moved the water table inside on a rainy day (with a tarp / towels underneath) and built up the marble run to sit inside the water table.  
Although my daughter played with it for a long time, my son quickly tired of the marbles not moving along as well in water as they normally do without water.  It may have also had something to do with the water table not being completely even (my engineer husband tried to fix it), but the marbles consistently got stuck halfway down the run due to water resistance.

Verdict: FAIL.

Saturday, May 17, 2014

Day 137: Refresh your Towels (fail).

Pinterest pin and website picture.

We've had the same master bath towels for years, so when my friend asked if I would try this pin on refreshing towels, I jumped at the chance.  This pin promises fresh smelling and absorbent towels, but after running them through the washer twice with hot water (once with 1 cup of vinegar and the next with 1/2 cup of baking soda) and drying them, I didn't notice any difference in the smell or absorbency of the towels.  Maybe it's time to invest in some new ones...
Before:
After:
Verdict: FAIL.

Friday, May 16, 2014

Friday Favorite: Use Sunglasses as Impromptu iPhone Holder.

Pinterest pin and website link.

There have been a handful of "emergencies" where I've needed to hand my phone off to my kids so that I could get something accomplished while they're occupied.  These scenarios typically end in lots of whining / fighting over who gets to hold the phone, who can't see, who's sitting too close to the screen, etc.  Problem solved with my sunglasses!
Verdict: SUCCESS!

Day 136: Baked Funfetti Donuts (fail).

Pinterest pin and website link.

These were all-around bad :(  Super sugary, too many sprinkles, horrible-tasting glaze.  Just trust me on this one -- don't waste your time.  I'd suggest hitting up Krispy Kreme instead.

I did like the blog author's idea of piping the batter into the donut pan.  
After mixing up the batter (it will be thick), spoon it into a Ziploc bag, snip off a side at the bottom of the bag, and slowly pipe the batter into the pan.  Voila!
Baked, but not yet glazed.  Too many sprinkles!
Glazed -- and the ones on the far left were achieved by following her instructions exactly.  Once I tasted the glaze (too much powdered sugar taste, in my opinion!), I just "dripped" some on the top instead of covering the entire donut.  Neither tasted very good!
Verdict: FAIL.

Thursday, May 15, 2014

Day 135: Perfect Cornbread (success).

Pinterest pin and website link.

I'm on a Disneyland food kick with my Pineapple Dole Whip yesterday and now, the homemade version of Disneyland's cornbread.  Perhaps we need to book tickets to the happiest place on Earth?!  This cornbread received rave reviews -- which is not surprising, since anything mixed with cake is bound to be delicious!

Ingredients:
2 (8.5 ounce) packages of Jiffy corn muffin mix
1 (18.25 ounce) box of yellow cake mix
5 eggs
2 cups milk
1/3 cup vegetable oil
Instructions:
Preheat oven to 350 degrees. Stir corn muffin and cake mix together in a large bowl. Add eggs, milk, and vegetable oil.  Stir.  Transfer batter to a greased 9×13 and 8×8 baking dish. Bake for 45-50 minutes, or until a toothpick comes out clean (mine were done after 35 minutes).
My kids liked this too -- but didn't like the teeny-tiny bit of chili I put on their plates!
Verdict: SUCCESS!

Wednesday, May 14, 2014

Day 134: Pineapple Whip (fail).

Pinterest pin and website link.

I've never had a Dole Whip at Disneyland before, but this homemade version is supposed to be close to the real deal, and since I like all the ingredients separately, I thought I would give it a try!  Unfortunately, the ingredient combo just wasn't good -- the almond milk and pineapple didn't meld well, and it seemed like there should be more honey included.

Ingredients:
1 fresh pineapple, peeled, cored, chopped and frozen (or, store-bought, frozen pineapple)
1 cup almond milk
1 tablespoon honey

Instructions:
The blog author suggested using a Vitamix or food processor versus a blender to get an ice cream-like consistency.  I used the food processor attachment on top of my blender and halved the recipe.
Combine the frozen pineapple with the almond milk and honey, and blend until smooth (this took awhile for me).  The full recipe makes 4-6 servings.  Serve immediately.
Verdict: FAIL (due to taste).

Tuesday, May 13, 2014

Day 133: Bubble Docking Station (success).

Pinterest pin and website link.

This is genius -- a docking station for bubble bottles!  The kiddos loved it -- and better yet, we didn't waste tons o' bubbles on this hot day of outside playing!
Verdict: SUCCESS!

Monday, May 12, 2014

Day 132: Baby Food Jars as Party Favors (fail).

Pinterest pin and website link.

I don't consider myself a hoarder, but then I find a box of random baby jar containers and lids that I have no idea why a) I saved and b) I moved from the house we were in when we had our babies to the house we are in now with toddlers / kids.  My youngest "baby" is almost three, so these jars have been taking up space for far too long!
I thought it would be symbolic to use my youngest child's baby jars as party favors for her upcoming "ballerina" birthday party.  It looked easy enough -- I had the jars, lids and candy, and just needed to buy the pink "ballet slipper" spray paint.

This project was a disaster!  The more I spray painted the lids, the more the lid writing was visible -- and smudged (see below -- the jar on the left was spray painted the least and the one on the right was painted the most)! Perhaps if I was gluing something on to the tops of these, they would have looked okay, but I didn't want to have an additional cost added to an item that people would just throw away when they get home from the party; I decided against doing that.
Verdict: FAIL.  I will eat the candy, the jars are going in the recycling and the lids are getting trashed tomorrow!

Sunday, May 11, 2014

Day 131: Favor Baskets from Scrapbook Paper (success).

Pinterest pin and website link.

These turned out so cute and only required a 12x12 piece of scrapbook paper, ruler, hole punch and ribbon.  After I finished the first one, I kept making them even though I don't have anything to go in them yet!  I'd better start baking and then distributing as friend / neighbor gifts!

I followed the blogger's tutorial exactly, and felt that she described the steps concisely -- go check them out and make your own baskets!  The only tip I would contribute is that it works better to use sturdy, double-sided scrapbook paper.  The folds are a little more difficult to do with the double-sided paper, but in the end, you'll have a much sturdier basket that will hold  more items and is pretty on both the inside and out!
Verdict: SUCCESS!

Saturday, May 10, 2014

Day 130: Storing Ice Cream in a Ziploc to Keep Soft (fail).

Pinterest pin and website link.

To perform my own test on this pin, I "splurged" and bought two containers of ice cream at the store last week.  I stored one container of ice cream (strawberry) in the freezer without a Ziploc bag, and one container (chocolate chip cookie dough) in the freezer with a Ziploc bag.  I saw no difference in softness when I was scooping them out tonight after a few days of sitting in the freezer.  My opinion?  Save your plastic bags and just put the container straight into the freezer!
Verdict: FAIL.

Friday, May 9, 2014

Friday Favorite: Organizing Cookie Cutters on a Paper Towel Holder.

Pinterest pin and website link.

My kids and I seem to use the same handful of cookie cutters again and again, so I loved the idea of organizing one the select few cutters we use all the time away from the big box we have shoved deep in the pantry!  The one problem is that we now have nowhere to put our paper towels :)  Guess it's time to invest in another paper towel holder!
Verdict: SUCCESS!

Day 129: Amplifying Cell Phone Music (success).

Pinterest pin and website link.

This worked amazingly well -- during this afternoon's auction set-up at my son's preschool, my friend placed her cell phone inside a glass bowl and we were then able to rock out to loud music while setting up!
Verdict: SUCCESS!

Thursday, May 8, 2014

Day 128: Freezing Cupcakes (works -- but a fail).

Pinterest pin and website link.

I typically bake cupcakes days / weeks in advance of when I need them and freeze them to keep; I then frost them while frozen.  I decided to try a new method of freezing cupcakes versus my typical way (throwing baked, cooled cupcakes into a Ziploc bag).  In the end, it was much more work, and didn't seem to make much -- if any -- difference in the final taste or texture.  Below, you can see that I froze some cupcakes in my traditional way, and then more cupcakes in the new way with saran wrap + foil + Ziploc bag.
Instructions:
Step 1: After baking the cupcakes, let them cool a bit; once they are cool, they can be wrapped. Lay large pieces of saran wrap in an X and then place 12 cupcakes in the center. Fold in one side and then the other, creating a nice seal.


Step 2: Lay out a long piece of foil and place cupcakes in center. Wrap foil around and fold sides in.
Step 3: Slip into a gallon Ziploc, and label with date and flavor.
The true test was when I ate these -- I was worried about my "traditional" packaging, as these cupcakes looked like they had a little freezer burn...

...and the ones with the new packaging weren't iced over at all.
However, I frosted both (while frozen), let them defrost, and then taste-tested, and they tasted exactly the same.  My vote?  It's not worth the extra effort + materials to use saran wrap and foil. 

Verdict: FAIL