Showing posts with label Success. Show all posts

Saturday, June 7, 2014

Day 158: Homemade Bubbles (success).

Pinterest pin and website link.

I count these as a success, although I still haven't found homemade bubbles that rival the "blowing power" of store-bought bubbles.  My kids seemed to like this previous recipe a little better than this one today.  Anyone else have a recipe for me to try??

Ingredients:
6 cups water
2 cups Dawn dishwashing liquid
3/4 cup light corn syrup

Instructions:
Mix all ingredients together in a large container.  Shake everything up and let sit for a few hours. Pour into empty bubbles containers to use with bubble wands.
Verdict: SUCCESS!

Friday, June 6, 2014

Day 157: Strawberry & Banana Popsicles (success).

Pinterest pin and website link.

I recently decided to invest in a ZOKU Quick Pop Maker, as my kids love Popsicles and I was hoping to sneak healthier ingredients into their favorite treat. Since this was our first time trying the Quick Pop Maker, we didn't combine the strawberry and banana flavors into one pop, as this took an additional step with the machine.  We made strawberry ones and banana ones separately, and the kids loved both.  I personally thought there was a bit too much lemon juice in both, particularly the banana flavor, but as you can see, my banana-loving child wasn't fazed!
Strawberry Popsicle Ingredients:
6 ounces hulled, quartered strawberries
1 tablespoon lemon juice
2 tablespoons vanilla yogurt
1 tablespoon milk
2 tablespoons sugar

Combine ingredients in a mini food processor (I used my Magic Bullet machine) until smooth.  Freeze mixture in Popsicle molds for a few hours (or 7-9 minutes with the Zoku Quick Pop Maker!).
Banana Popsicle Ingredients:
6 ounces (about ¾ cup) mashed ripe bananas (this was two small bananas for me)
2 tablespoons milk
1½ tablespoons lemon juice
1 tablespoon sugar

Combine using the method described above -- puree, freeze & enjoy!
Verdict: SUCCESS!

Thursday, June 5, 2014

Day 156: Pom-Poms as Erasers (success).

Pinterest pin and website link.

My kids love to use dry erase markers and this pin looked like a quick way for them to easily erase their work if they made a mistake.  This was easy and worked -- simply hot-glue gun a pom-pom on the bottom of a dry erase marker.
The only negative was that my son kept losing the marker cap (since he usually sticks it on the bottom of the marker while in use), but he was occupied for quite awhile with drawing and erasing, so I count that as a success!

Verdict: SUCCESS!

Wednesday, June 4, 2014

Day 155: Tension Rod to Hold Pot Lids (success).

Pinterest pin and website link.

I had to modify this pin a bit, as my pots and pans are not in a drawer, but in a large cabinet underneath the stove.  I already use a tension rod in the cabinet to keep cutting boards, placemats and cookie sheets upright, but the pots, pans and lids are a mess:
I took the pots, pans and lids out, installed a tension rod along the back of the cabinet and stuck 4 of the 6 lids along the back wall.
I was then able to more easily stack the pots and pans (and only 2 lids) in the front of the cabinet.
Verdict: SUCCESS!

Monday, June 2, 2014

Day 153: Cleaning Dirty Oven Racks (success).

Pinterest pin and website link.
 
I've completed several pins on cleaning my oven, but have never found anything on cleaning the oven racks.  And I think we can all agree that mine were disgusting :(
Instructions:
Place oven racks in the bath tub and fill with HOT water until racks are covered.  While the water is on, add about 6 dryer sheets and 1/2 cup of dish soap (I used the original blue Dawn).
Let sit overnight. Remove any remaining buildup with the dryer sheets.
They're not perfect, but they're SO much better -- and  most of the grease and build-up came easily off by lightly scrubbing with the dryer sheets in the morning.
This probably goes without saying, but you'll need to clean your bathtub after completing this pin!
 
Verdict: SUCCESS!

Sunday, June 1, 2014

Day 152: Camping Tacos (success).

Pinterest pin and website link.

These were so easy and perfect for our upcoming camping trip!  And as a bonus, the only items to wash were the serving dishes, as we will use plastic silverware while camping.

Instructions:
Buy snack-sized bags of chips (I bought the variety pack and thought we'd only use the Fritos, but my husband thought that using Doritos tasted better!). 
Open and roll down the edges of each chip bag.  Add any taco ingredients you normally would (we had sour cream, cheese, salsa, lettuce, and olives, plus ground beef with taco seasoning).  When taking this as a camping meal, I'd cut up all ingredients prior to leaving, plus brown  the meat at home and then warm up over the fire or camp stove.  The kids couldn't believe they got to eat chips for dinner!
Verdict: SUCCESS!

Saturday, May 31, 2014

Day 151: DIY Eye Make-up Remover (success).

Pinterest pin and website link.

I apologize in advance for these creepy close-up eye pictures of me!  But, this homemade eye make-up remover really works -- and it's cheap!

My eyes at the end of the day: 
Eye Makeup Remover Ingredients & Instructions:
1 cup water
1-1/2 tablespoons tear-free baby shampoo
1/8 teaspoon baby oil

Mix ingredients together in a small container.  Shake before every use.

Verdict: SUCCESS!

Friday, May 30, 2014

Day 150: Using Vegetable Glycerin in Homemade Hand Scrub (success).

Pinterest pin and website link.

I have super dry hands in the winter and wanted to try adding vegetable glycerin to the Mary Kay's "Satin Hands" recipe, as suggested by the blog author.  I made the recipe per the pin, and added 1 tablespoon of vegetable glycerin at the end.  I did notice that it didn't dry out my hands as much (a success), but I didn't like how it made the scrub ingredients separate out in the jar (a fail, in my opinion).  This wouldn't look as pretty or be as user-friendly (the receiving person would have to stir the scrub before each use) if giving as a gift.
Verdict: SUCCESS / FAIL.

Thursday, May 29, 2014

Day 149: Honey Whole-Wheat Sandwich Bread (success).

Pinterest pin and website link.
 
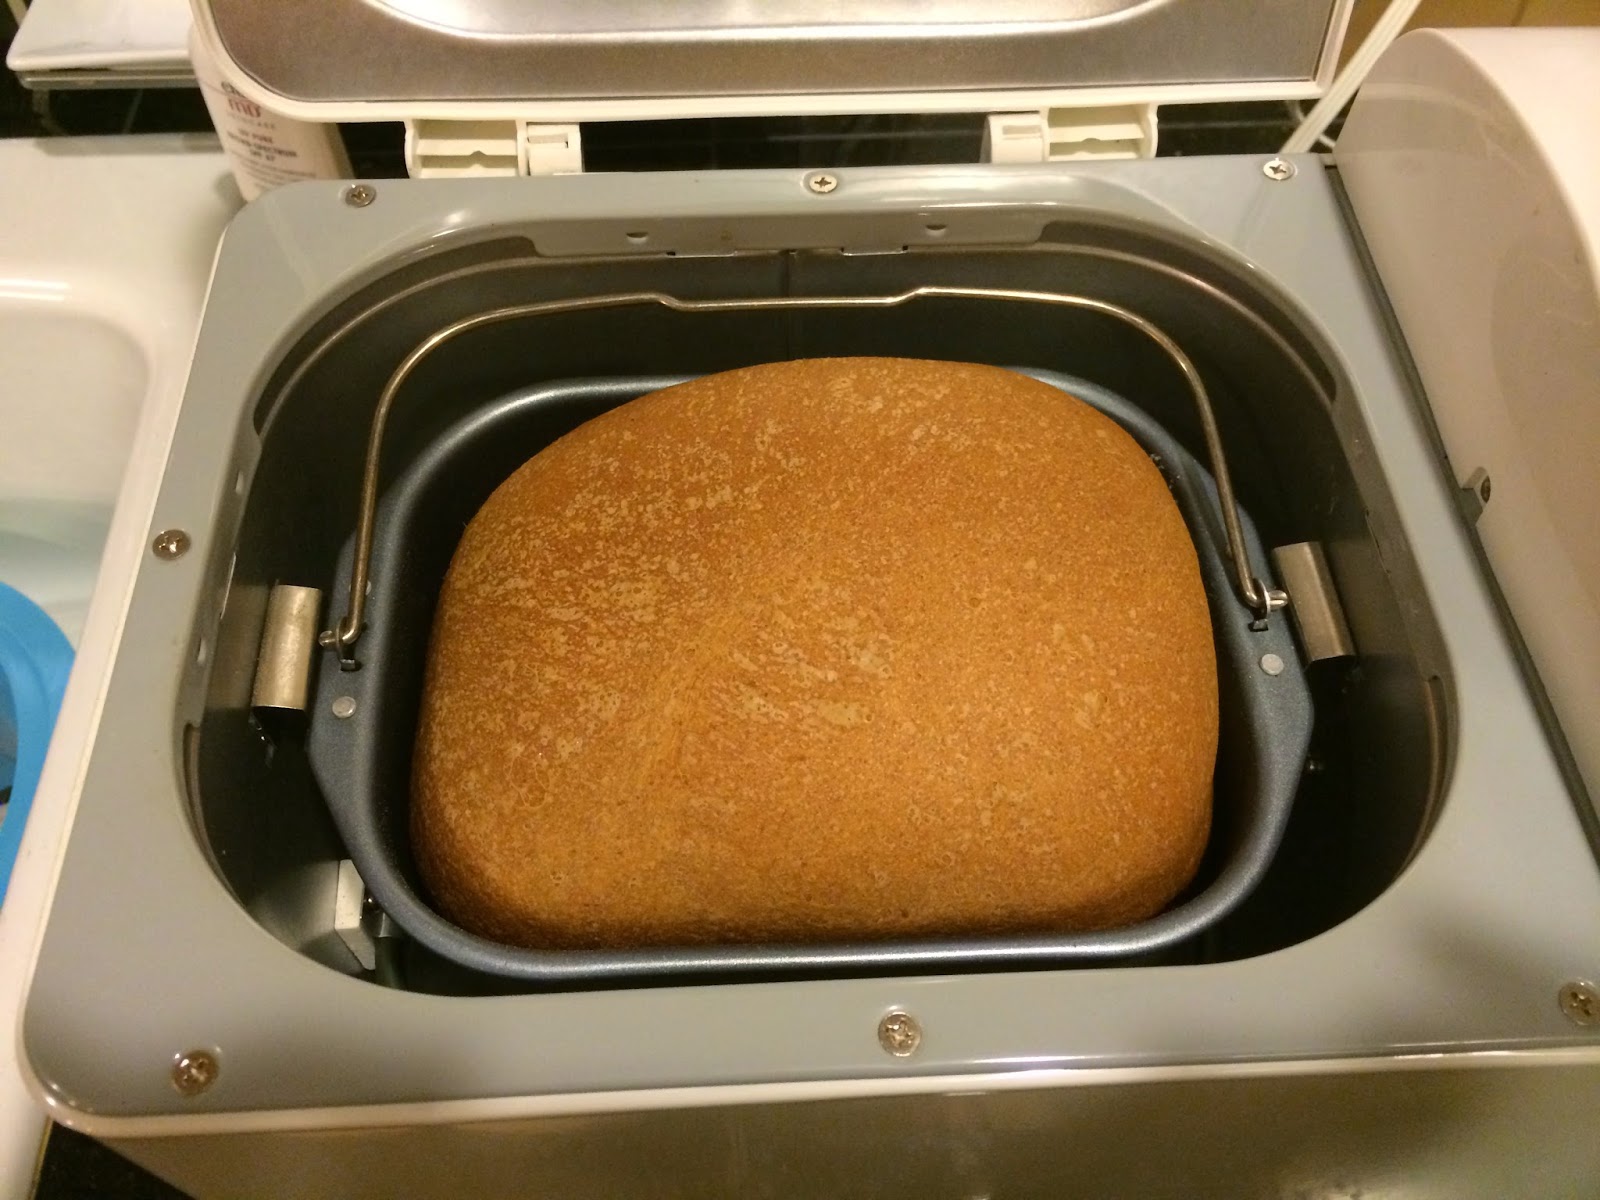
This was the best bread recipe I've made -- my family loved it!  I hesitated to even make this bread because only half of it is done in the bread machine -- but I'm really glad I tried it despite the extra effort it takes!  I actually made one loaf by following the pin exactly (loaf below on the right), and the other loaf completely in the bread machine (loaf below on the left).  Hands down, the one that tasted the best was the one that followed the pin.
Ingredients:
1 3/4 cup warm water (between 110 – 115 degrees)
3 tablespoons butter
1/4 cup honey
1/4 cup molasses
1-1/2 teaspoons salt
2 cups white bread flour
2-1/2 cups wheat flour
1/2 cup
ground flaxseed
2-1/4 teaspoon yeast
 
Directions:
1. Add contents per your bread machine’s manufacturer directions. (Example, wet, dry, yeast.)
2. Turn to dough setting for 1-1/2 hours.
3. Grease two 9-inch loaf pans with cooking spray or vegetable shortening.
3. Once dough cycle is completed, turn dough out on lightly floured surface with oiled hands.
5. Knead slightly and form into to two loaves.
6. Place in prepared loaf pans, cover with cotton towel, and let rise in warm area for 30 minutes or until double in size.
7. Preheat oven to 350 degrees.
8. Place in preheated oven and bake for 25 minutes.
9. Cool in wire rack.
10. Let bread completely cool before slicing and eating to ensure the softest bread.
 
Verdict: SUCCESS!

Wednesday, May 28, 2014

Day 148: Simple Bread Machine Bread (success).

 Pinterest pin and website link.

I am on a mission to use the appliances in my kitchen that I've rarely (or never!) used -- or I'm going to get rid of them!  I'm so happy that I tried out my bread machine.  This was a simple recipe to make and the bread was good!

Ingredients1-1/3 cups warm water, about 110 degrees
2 Tablespoons and 2 teaspoons white sugar
3 teaspoons yeast
1/3 cup olive oil
4 cups flour (I used 1-1/2 cups whole wheat flour and 2-1/2 cups white bread flour)
2 teaspoons salt
 Directions
In a bread machine, place water, oil and salt.  Add flour on top of liquids. Pour sugar into one corner of the bread machine basket. Then make a well in the center of the flour and pour in the yeast. 
 Set your bread machine for "basic" loaf, and let it do the work for you! 

Verdict: SUCCESS!  My family liked this bread, and even though I've found another recipe we like ever better, this one is much easier to do because all the steps are in the bread machine!

Monday, May 26, 2014

Day 146: Organizing Lego Instruction Books (success).

Pinterest pin and website link.

My son is just getting into Legos, which means that although we only have a few sets, I'm stepping on tiny Legos everywhere in the house!  I will be looking into Lego storage solutions at some point, but for now, I wanted to try organizing the instruction booklets; the books are already getting torn and ripped from use, and are just thrown in the box with all the Lego pieces.
I took the staples out of the middle of the instruction books and put each page in a plastic page protector before placing in a binder.  My husband thought this was over-kill (he suggested putting the entire booklet in one page protector, as it took A TON of protectors to do the three little sets we have!), but I've already noticed my son is more willing to take apart and re-build his current Legos now that the instructions are easier for him to flip through and see.
For now, this is the system we're using -- I may have to adapt it when he gets more sets with longer instructions!

Verdict: SUCCESS!

Sunday, May 25, 2014

Day 145: Foil-Wrapped Salmon (success).

Pinterest pin and website link.

Ingredients:
Salmon fillet (I purchased the wild salmon from Costco -- and was able to cut it in large pieces before baking and freeze 3/4 of it for future meals)

2 tsp. olive oil (to grease foil)

4 tsp. basil pesto (I used the Costco basil pesto in a jar)

Tomatoes, sliced about 1/4 inch thick

Instructions:
Preheat oven to 450 F.  Place a baking sheet in the oven to heat while you prep the salmon (I didn't do this step, and the salmon was still baked to perfection).

Tear two pieces of foil, big enough to wrap salmon with some overlapping. Place foil pieces one on top of the other. Put about 2 tsp. olive oil in center of top piece of foil and lay salmon on top of oil.

Spread basil pesto over the salmon. Arrange sliced tomatoes over pesto so they cover the top of the salmon.

Wrap salmon securely in foil, doubling over the seam and ends several times. Place salmon packet on heated baking sheet and cook 15 minutes.

Remove from oven after 15 minutes and let sit 2-3 minutes. Then open carefully and serve immediately, while salmon and tomatoes are hot.


Verdict: SUCCESS!

Thursday, May 22, 2014

Day 142: Using Baking Soda to Exfoliate (success).

Pinterest pin and website link.

Through this pin-a-day journey I'm on, I've discovered that the most versatile item in my house is baking soda.  It feels like it can -- and should! -- be used for everything!  About two months ago, I decided to attempt using baking soda as a facial exfoliate, and it has worked great!  I decided to spare you a close-up photo of my face, and instead explain just how different my face feels :)

Instructions:
Wet your face (I use a washcloth).  Pump a quarter-sized dollop of facial cleanser into the palm of your hand (as you can see, my true Costco loyalty extends even to my facial cleanser!).  Pour about a teaspoon of baking soda into your hand and mix well to combine with the facial cleanser.  Using a circular motion, massage the mixture onto the skin for 30 seconds to remove dirt, oil and dead skin, particularly around the nose, chin and forehead.  Rinse the baking soda scrub away (this is my only complaint with the baking soda scrub -- I try to carefully wash it away with a washcloth, but this step can be a bit irritating to my skin.  It takes a few times of wiping my face and rinsing out the washcloth before the gritty baking soda is completely removed from my face).  Repeat once a week.
I've tried other exfoliating treatments in the past, and my skin has never felt this smooth.  Try it!

Verdict: SUCCESS!

Wednesday, May 21, 2014

Day 141: Life Hack -- How to Re-Open a Closed Computer Tab (success).

Pinterest pin and website link.

This seemed like a silly thing to test and then blog about, but since trying it recently, I realize how often I do accidentally close a tab that I need / want to get back to while working on my computer!  I thought it was worth passing along that this works!
Verdict: SUCCESS!

Thursday, May 15, 2014

Day 135: Perfect Cornbread (success).

Pinterest pin and website link.

I'm on a Disneyland food kick with my Pineapple Dole Whip yesterday and now, the homemade version of Disneyland's cornbread.  Perhaps we need to book tickets to the happiest place on Earth?!  This cornbread received rave reviews -- which is not surprising, since anything mixed with cake is bound to be delicious!

Ingredients:
2 (8.5 ounce) packages of Jiffy corn muffin mix
1 (18.25 ounce) box of yellow cake mix
5 eggs
2 cups milk
1/3 cup vegetable oil
Instructions:
Preheat oven to 350 degrees. Stir corn muffin and cake mix together in a large bowl. Add eggs, milk, and vegetable oil.  Stir.  Transfer batter to a greased 9×13 and 8×8 baking dish. Bake for 45-50 minutes, or until a toothpick comes out clean (mine were done after 35 minutes).
My kids liked this too -- but didn't like the teeny-tiny bit of chili I put on their plates!
Verdict: SUCCESS!

Tuesday, May 13, 2014

Day 133: Bubble Docking Station (success).

Pinterest pin and website link.

This is genius -- a docking station for bubble bottles!  The kiddos loved it -- and better yet, we didn't waste tons o' bubbles on this hot day of outside playing!
Verdict: SUCCESS!
Sunday, May 11, 2014

Day 131: Favor Baskets from Scrapbook Paper (success).

Pinterest pin and website link.

These turned out so cute and only required a 12x12 piece of scrapbook paper, ruler, hole punch and ribbon.  After I finished the first one, I kept making them even though I don't have anything to go in them yet!  I'd better start baking and then distributing as friend / neighbor gifts!

I followed the blogger's tutorial exactly, and felt that she described the steps concisely -- go check them out and make your own baskets!  The only tip I would contribute is that it works better to use sturdy, double-sided scrapbook paper.  The folds are a little more difficult to do with the double-sided paper, but in the end, you'll have a much sturdier basket that will hold  more items and is pretty on both the inside and out!
Verdict: SUCCESS!

Friday, May 9, 2014

Friday Favorite: Organizing Cookie Cutters on a Paper Towel Holder.

Pinterest pin and website link.

My kids and I seem to use the same handful of cookie cutters again and again, so I loved the idea of organizing one the select few cutters we use all the time away from the big box we have shoved deep in the pantry!  The one problem is that we now have nowhere to put our paper towels :)  Guess it's time to invest in another paper towel holder!
Verdict: SUCCESS!

Day 129: Amplifying Cell Phone Music (success).

Pinterest pin and website link.

This worked amazingly well -- during this afternoon's auction set-up at my son's preschool, my friend placed her cell phone inside a glass bowl and we were then able to rock out to loud music while setting up!
Verdict: SUCCESS!

Wednesday, May 7, 2014

Day 127: Upholstery Stain Remover (success).

Pinterest pin and website link.

I had credit at our local kids' consignment store and decided to "purchase" this cute chair (for free!) for my daughter's room.  I figured I could re-upholstery the seat, if needed, but this upholstery stain remover did the trick to take the majority of the stains out!
Chair with original stains:
Ingredients:
Baking soda (enough to cover stains)
1/2 tablespoon of vinegar
1/2 tablespoon of dish soap (I used Dawn)
1 cup hot water

Instructions:
Sprinkle baking soda on the stain and let it sit for 10 minutes.  I was very liberal with my baking soda.  If taking stains out of carpet, the pin says to vacuum the baking soda up after 10 minutes, but I left mine on and think it may have helped to "exfoliate" the stains out of the fabric in combination with the solution below.
 Create a solution by mixing the water, vinegar and dish soap together.
With a clean cloth, blot / scrub at the stain with the solution until the stains are gone (or much less visible).  Voila!
 Here are the before and after shots of the chair upholstery, close-up!
Verdict: SUCCESS!