Pinterest pin and website link.
I recently decided to invest in a ZOKU Quick Pop Maker, as my kids love Popsicles and I was hoping to sneak healthier ingredients into their favorite treat. Since this was our first time trying the Quick Pop Maker, we didn't combine the strawberry and banana flavors into one pop, as this took an additional step with the machine. We made strawberry ones and banana ones separately, and the kids loved both. I personally thought there was a bit too much lemon juice in both, particularly the banana flavor, but as you can see, my banana-loving child wasn't fazed!
Strawberry Popsicle Ingredients:
6 ounces hulled, quartered strawberries
1 tablespoon lemon juice
2 tablespoons vanilla yogurt
1 tablespoon milk
2 tablespoons sugar
Combine ingredients in a mini food processor (I used my Magic Bullet machine) until smooth. Freeze mixture in Popsicle molds for a few hours (or 7-9 minutes with the Zoku Quick Pop Maker!).
Banana Popsicle Ingredients:
6 ounces (about ¾ cup) mashed ripe bananas (this was two small bananas for me)
2 tablespoons milk
1½ tablespoons lemon juice
1 tablespoon sugar
Combine using the method described above -- puree, freeze & enjoy!
Verdict: SUCCESS!
Showing posts with label Food. Show all posts
Friday, June 6, 2014
Sunday, June 1, 2014
Day 152: Camping Tacos (success).
Pinterest pin and website link.
These were so easy and perfect for our upcoming camping trip! And as a bonus, the only items to wash were the serving dishes, as we will use plastic silverware while camping.
Instructions:
Buy snack-sized bags of chips (I bought the variety pack and thought we'd only use the Fritos, but my husband thought that using Doritos tasted better!).
Open and roll down the edges of each chip bag. Add any taco ingredients you normally would (we had sour cream, cheese, salsa, lettuce, and olives, plus ground beef with taco seasoning). When taking this as a camping meal, I'd cut up all ingredients prior to leaving, plus brown the meat at home and then warm up over the fire or camp stove. The kids couldn't believe they got to eat chips for dinner!
Verdict: SUCCESS!
These were so easy and perfect for our upcoming camping trip! And as a bonus, the only items to wash were the serving dishes, as we will use plastic silverware while camping.
Instructions:
Buy snack-sized bags of chips (I bought the variety pack and thought we'd only use the Fritos, but my husband thought that using Doritos tasted better!).
Open and roll down the edges of each chip bag. Add any taco ingredients you normally would (we had sour cream, cheese, salsa, lettuce, and olives, plus ground beef with taco seasoning). When taking this as a camping meal, I'd cut up all ingredients prior to leaving, plus brown the meat at home and then warm up over the fire or camp stove. The kids couldn't believe they got to eat chips for dinner!
Verdict: SUCCESS!
Thursday, May 29, 2014
Day 149: Honey Whole-Wheat Sandwich Bread (success).
This was the best bread recipe I've made -- my family loved it! I hesitated to even make this bread because only half of it is done in the bread machine -- but I'm really glad I tried it despite the extra effort it takes! I actually made one loaf by following the pin exactly (loaf below on the right), and the other loaf completely in the bread machine (loaf below on the left). Hands down, the one that tasted the best was the one that followed the pin.
Ingredients:
1 3/4 cup warm water (between 110 – 115 degrees)
3 tablespoons butter
1/4 cup honey
1/4 cup molasses
1-1/2 teaspoons salt
2 cups white bread flour
2-1/2 cups wheat flour
1/2 cup ground flaxseed
2-1/4 teaspoon yeast
3 tablespoons butter
1/4 cup honey
1/4 cup molasses
1-1/2 teaspoons salt
2 cups white bread flour
2-1/2 cups wheat flour
1/2 cup ground flaxseed
2-1/4 teaspoon yeast
Directions:
1. Add contents per your bread machine’s manufacturer directions. (Example, wet, dry, yeast.)
2. Turn to dough setting for 1-1/2 hours.
3. Grease two 9-inch loaf pans with cooking spray or vegetable shortening.
3. Once dough cycle is completed, turn dough out on lightly floured surface with oiled hands.
5. Knead slightly and form into to two loaves.
6. Place in prepared loaf pans, cover with cotton towel, and let rise in warm area for 30 minutes or until double in size.
7. Preheat oven to 350 degrees.
8. Place in preheated oven and bake for 25 minutes.
9. Cool in wire rack.
10. Let bread completely cool before slicing and eating to ensure the softest bread.

Verdict: SUCCESS!
Wednesday, May 28, 2014
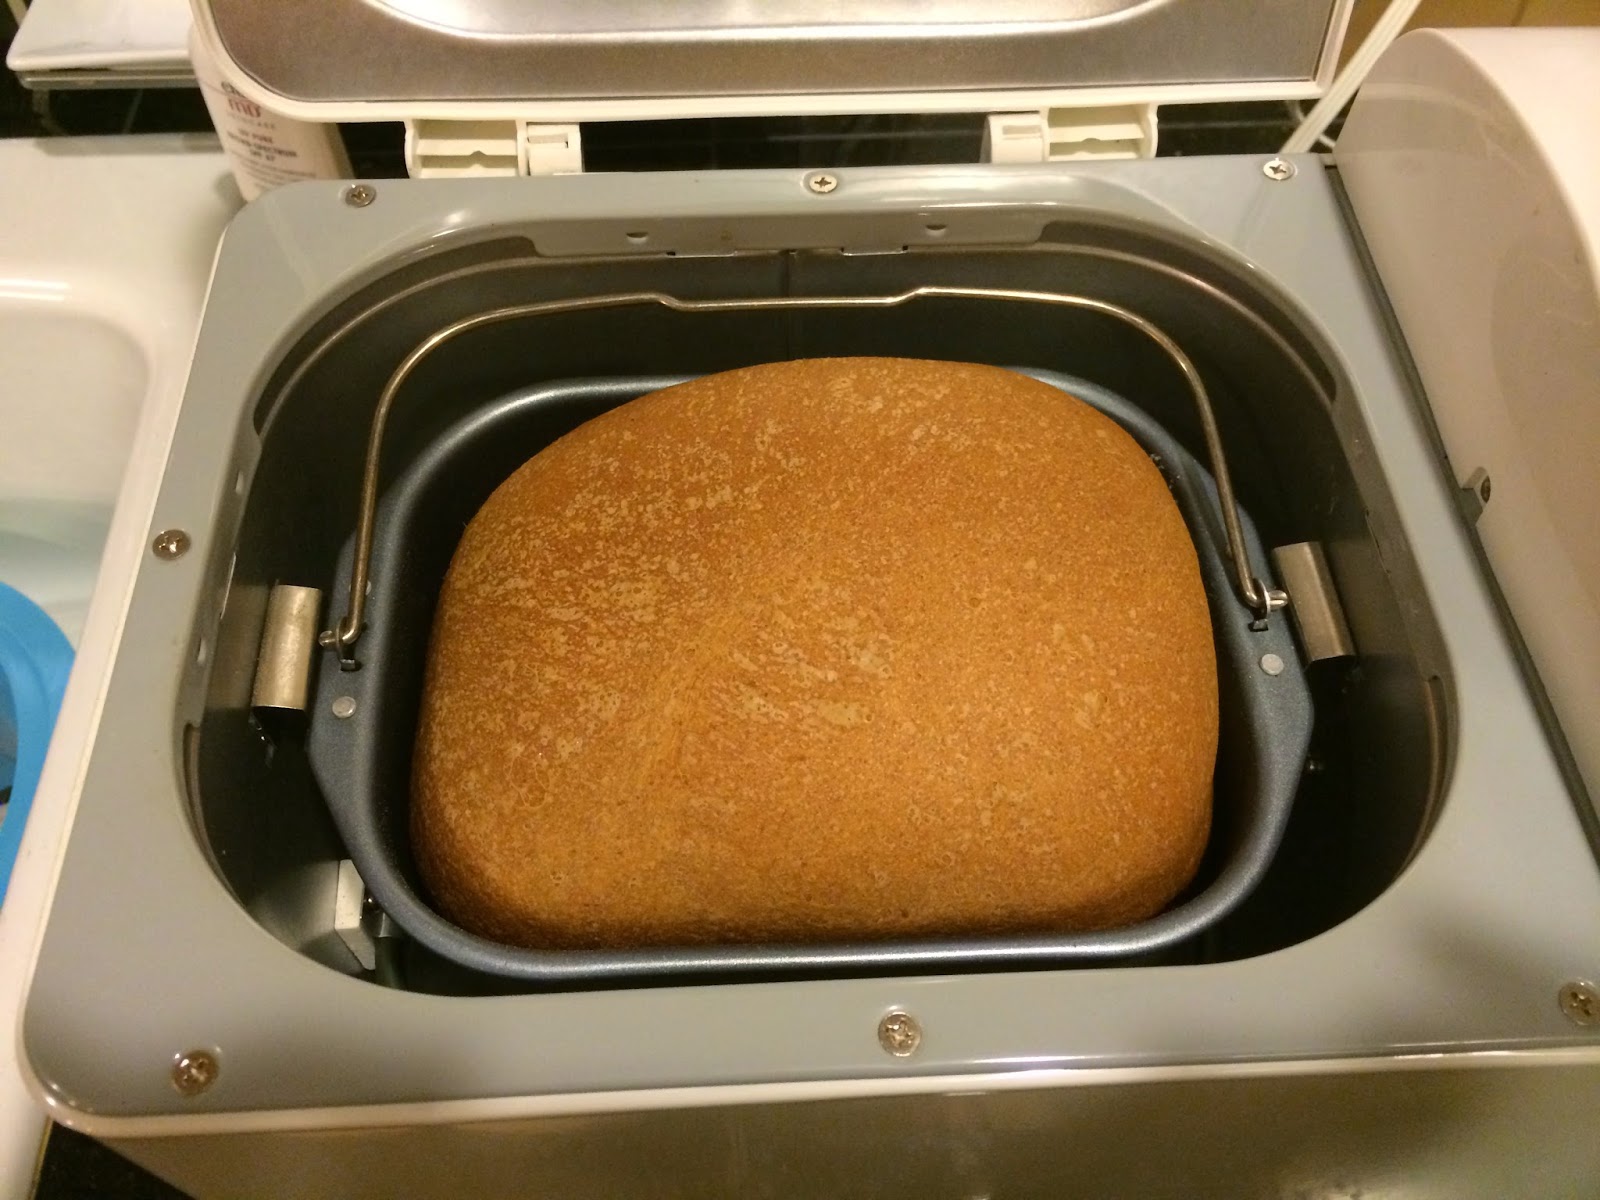
Day 148: Simple Bread Machine Bread (success).
Pinterest pin and website link.
I am on a mission to use the appliances in my kitchen that I've rarely (or never!) used -- or I'm going to get rid of them! I'm so happy that I tried out my bread machine. This was a simple recipe to make and the bread was good!
Ingredients1-1/3 cups warm water, about 110 degrees
2 Tablespoons and 2 teaspoons white sugar
3 teaspoons yeast
1/3 cup olive oil
4 cups flour (I used 1-1/2 cups whole wheat flour and 2-1/2 cups white bread flour)
2 teaspoons salt
Directions
Verdict: SUCCESS! My family liked this bread, and even though I've found another recipe we like ever better, this one is much easier to do because all the steps are in the bread machine!
I am on a mission to use the appliances in my kitchen that I've rarely (or never!) used -- or I'm going to get rid of them! I'm so happy that I tried out my bread machine. This was a simple recipe to make and the bread was good!
Ingredients1-1/3 cups warm water, about 110 degrees
2 Tablespoons and 2 teaspoons white sugar
3 teaspoons yeast
1/3 cup olive oil
4 cups flour (I used 1-1/2 cups whole wheat flour and 2-1/2 cups white bread flour)
2 teaspoons salt
Directions
In a bread machine, place water, oil and salt. Add flour on top of liquids. Pour sugar into one corner of the bread machine basket. Then make a well in the center of the flour and pour in the yeast.
Set your bread machine for "basic" loaf, and let it do the work for you!
Verdict: SUCCESS! My family liked this bread, and even though I've found another recipe we like ever better, this one is much easier to do because all the steps are in the bread machine!
Sunday, May 25, 2014
Day 145: Foil-Wrapped Salmon (success).
Pinterest pin and website link.
Ingredients:
Salmon fillet (I purchased the wild salmon from Costco -- and was able to cut it in large pieces before baking and freeze 3/4 of it for future meals)
2 tsp. olive oil (to grease foil)
4 tsp. basil pesto (I used the Costco basil pesto in a jar)
Tomatoes, sliced about 1/4 inch thick
Instructions:
Preheat oven to 450 F. Place a baking sheet in the oven to heat while you prep the salmon (I didn't do this step, and the salmon was still baked to perfection).
Tear two pieces of foil, big enough to wrap salmon with some overlapping. Place foil pieces one on top of the other. Put about 2 tsp. olive oil in center of top piece of foil and lay salmon on top of oil.
Spread basil pesto over the salmon. Arrange sliced tomatoes over pesto so they cover the top of the salmon.
Wrap salmon securely in foil, doubling over the seam and ends several times. Place salmon packet on heated baking sheet and cook 15 minutes.
Remove from oven after 15 minutes and let sit 2-3 minutes. Then open carefully and serve immediately, while salmon and tomatoes are hot.
Verdict: SUCCESS!
Ingredients:
Salmon fillet (I purchased the wild salmon from Costco -- and was able to cut it in large pieces before baking and freeze 3/4 of it for future meals)
2 tsp. olive oil (to grease foil)
4 tsp. basil pesto (I used the Costco basil pesto in a jar)
Tomatoes, sliced about 1/4 inch thick
Instructions:
Preheat oven to 450 F. Place a baking sheet in the oven to heat while you prep the salmon (I didn't do this step, and the salmon was still baked to perfection).
Tear two pieces of foil, big enough to wrap salmon with some overlapping. Place foil pieces one on top of the other. Put about 2 tsp. olive oil in center of top piece of foil and lay salmon on top of oil.
Spread basil pesto over the salmon. Arrange sliced tomatoes over pesto so they cover the top of the salmon.
Wrap salmon securely in foil, doubling over the seam and ends several times. Place salmon packet on heated baking sheet and cook 15 minutes.
Remove from oven after 15 minutes and let sit 2-3 minutes. Then open carefully and serve immediately, while salmon and tomatoes are hot.
Verdict: SUCCESS!
Friday, May 16, 2014
Day 136: Baked Funfetti Donuts (fail).
Pinterest pin and website link.
These were all-around bad :( Super sugary, too many sprinkles, horrible-tasting glaze. Just trust me on this one -- don't waste your time. I'd suggest hitting up Krispy Kreme instead.
I did like the blog author's idea of piping the batter into the donut pan.
After mixing up the batter (it will be thick), spoon it into a Ziploc bag, snip off a side at the bottom of the bag, and slowly pipe the batter into the pan. Voila!
These were all-around bad :( Super sugary, too many sprinkles, horrible-tasting glaze. Just trust me on this one -- don't waste your time. I'd suggest hitting up Krispy Kreme instead.
I did like the blog author's idea of piping the batter into the donut pan.
After mixing up the batter (it will be thick), spoon it into a Ziploc bag, snip off a side at the bottom of the bag, and slowly pipe the batter into the pan. Voila!
Baked, but not yet glazed. Too many sprinkles!
Glazed -- and the ones on the far left were achieved by following her instructions exactly. Once I tasted the glaze (too much powdered sugar taste, in my opinion!), I just "dripped" some on the top instead of covering the entire donut. Neither tasted very good!
Verdict: FAIL.
Thursday, May 15, 2014
Day 135: Perfect Cornbread (success).
Pinterest pin and website link.
I'm on a Disneyland food kick with my Pineapple Dole Whip yesterday and now, the homemade version of Disneyland's cornbread. Perhaps we need to book tickets to the happiest place on Earth?! This cornbread received rave reviews -- which is not surprising, since anything mixed with cake is bound to be delicious!
Ingredients:
Preheat oven to 350 degrees. Stir corn muffin and cake mix together in a large bowl. Add eggs, milk, and vegetable oil. Stir. Transfer batter to a greased 9×13 and 8×8 baking dish. Bake for 45-50 minutes, or until a toothpick comes out clean (mine were done after 35 minutes).
I'm on a Disneyland food kick with my Pineapple Dole Whip yesterday and now, the homemade version of Disneyland's cornbread. Perhaps we need to book tickets to the happiest place on Earth?! This cornbread received rave reviews -- which is not surprising, since anything mixed with cake is bound to be delicious!
Ingredients:
2 (8.5 ounce) packages of Jiffy corn muffin mix
1 (18.25 ounce) box of yellow cake mix
5 eggs
2 cups milk
1/3 cup vegetable oil
Instructions:1 (18.25 ounce) box of yellow cake mix
5 eggs
2 cups milk
1/3 cup vegetable oil
Preheat oven to 350 degrees. Stir corn muffin and cake mix together in a large bowl. Add eggs, milk, and vegetable oil. Stir. Transfer batter to a greased 9×13 and 8×8 baking dish. Bake for 45-50 minutes, or until a toothpick comes out clean (mine were done after 35 minutes).
My kids liked this too -- but didn't like the teeny-tiny bit of chili I put on their plates!
Verdict: SUCCESS!
Wednesday, May 14, 2014
Day 134: Pineapple Whip (fail).
Pinterest pin and website link.
I've never had a Dole Whip at Disneyland before, but this homemade version is supposed to be close to the real deal, and since I like all the ingredients separately, I thought I would give it a try! Unfortunately, the ingredient combo just wasn't good -- the almond milk and pineapple didn't meld well, and it seemed like there should be more honey included.
Ingredients:
1 fresh pineapple, peeled, cored, chopped and frozen (or, store-bought, frozen pineapple)
1 cup almond milk
1 tablespoon honey
I've never had a Dole Whip at Disneyland before, but this homemade version is supposed to be close to the real deal, and since I like all the ingredients separately, I thought I would give it a try! Unfortunately, the ingredient combo just wasn't good -- the almond milk and pineapple didn't meld well, and it seemed like there should be more honey included.
Ingredients:
1 fresh pineapple, peeled, cored, chopped and frozen (or, store-bought, frozen pineapple)
1 cup almond milk
1 tablespoon honey
Instructions:
The blog author suggested using a Vitamix or food processor versus a blender to get an ice cream-like consistency. I used the food processor attachment on top of my blender and halved the recipe.
Combine the frozen pineapple with the almond milk and honey, and blend until smooth (this took awhile for me). The full recipe makes 4-6 servings. Serve immediately.
Verdict: FAIL (due to taste).
Saturday, May 10, 2014
Day 130: Storing Ice Cream in a Ziploc to Keep Soft (fail).
Pinterest pin and website link.
To perform my own test on this pin, I "splurged" and bought two containers of ice cream at the store last week. I stored one container of ice cream (strawberry) in the freezer without a Ziploc bag, and one container (chocolate chip cookie dough) in the freezer with a Ziploc bag. I saw no difference in softness when I was scooping them out tonight after a few days of sitting in the freezer. My opinion? Save your plastic bags and just put the container straight into the freezer!
Verdict: FAIL.
To perform my own test on this pin, I "splurged" and bought two containers of ice cream at the store last week. I stored one container of ice cream (strawberry) in the freezer without a Ziploc bag, and one container (chocolate chip cookie dough) in the freezer with a Ziploc bag. I saw no difference in softness when I was scooping them out tonight after a few days of sitting in the freezer. My opinion? Save your plastic bags and just put the container straight into the freezer!
Verdict: FAIL.
Thursday, May 8, 2014
Day 128: Freezing Cupcakes (works -- but a fail).
Pinterest pin and website link.
I typically bake cupcakes days / weeks in advance of when I need them and freeze them to keep; I then frost them while frozen. I decided to try a new method of freezing cupcakes versus my typical way (throwing baked, cooled cupcakes into a Ziploc bag). In the end, it was much more work, and didn't seem to make much -- if any -- difference in the final taste or texture. Below, you can see that I froze some cupcakes in my traditional way, and then more cupcakes in the new way with saran wrap + foil + Ziploc bag.
Instructions:
...and the ones with the new packaging weren't iced over at all.
However, I frosted both (while frozen), let them defrost, and then taste-tested, and they tasted exactly the same. My vote? It's not worth the extra effort + materials to use saran wrap and foil.
Verdict: FAIL
I typically bake cupcakes days / weeks in advance of when I need them and freeze them to keep; I then frost them while frozen. I decided to try a new method of freezing cupcakes versus my typical way (throwing baked, cooled cupcakes into a Ziploc bag). In the end, it was much more work, and didn't seem to make much -- if any -- difference in the final taste or texture. Below, you can see that I froze some cupcakes in my traditional way, and then more cupcakes in the new way with saran wrap + foil + Ziploc bag.
Instructions:
Step 1: After baking the cupcakes, let them cool a bit; once they are cool, they can be wrapped. Lay large pieces of saran wrap in an X and then place 12 cupcakes in the center. Fold in one side and then the other, creating a nice seal.
Step 2: Lay out a long piece of foil and place cupcakes in center. Wrap foil around and fold sides in.
Step 3: Slip into a gallon Ziploc, and label with date and flavor.
The true test was when I ate these -- I was worried about my "traditional" packaging, as these cupcakes looked like they had a little freezer burn...
...and the ones with the new packaging weren't iced over at all.
However, I frosted both (while frozen), let them defrost, and then taste-tested, and they tasted exactly the same. My vote? It's not worth the extra effort + materials to use saran wrap and foil.
Verdict: FAIL
Tuesday, May 6, 2014
Day 126: Simple Steamed Broccoli (success).
Pinterest pin and website link.
We eat lots of broccoli in this house, as it's the only steamed vegetable my kids will eat. With the combination of the sugar in the water and the melted butter, I thought they would love this; my husband and I thought it was delicious, but the kids missed the salty taste (I usually mix the steamed broccoli with coconut oil and salt). I plan to do this recipe again to see if the kiddos take to it on the second attempt.
Ingredients:
3-4 cups fresh broccoli
1 teaspoon sugar
1/4 cup butter (this seemed like a lot to me -- I used half of this)
water
Instructions:
Place the sugar and water in the bottom of pot; insert steamer basket. Bring water to a boil and then reduce heat to medium.
Add broccoli to basket and cover with a lid. Steam for 7-8 minutes.
While steaming broccoli, melt butter in the microwave.
Mix broccoli and butter together.
Verdict: SUCCESS!
We eat lots of broccoli in this house, as it's the only steamed vegetable my kids will eat. With the combination of the sugar in the water and the melted butter, I thought they would love this; my husband and I thought it was delicious, but the kids missed the salty taste (I usually mix the steamed broccoli with coconut oil and salt). I plan to do this recipe again to see if the kiddos take to it on the second attempt.
Ingredients:
3-4 cups fresh broccoli
1 teaspoon sugar
1/4 cup butter (this seemed like a lot to me -- I used half of this)
water
Instructions:
Place the sugar and water in the bottom of pot; insert steamer basket. Bring water to a boil and then reduce heat to medium.
Add broccoli to basket and cover with a lid. Steam for 7-8 minutes.
While steaming broccoli, melt butter in the microwave.
Mix broccoli and butter together.
Verdict: SUCCESS!
Monday, May 5, 2014
Day 125: Chocolate Fudge Cupcakes (fail).
Pinterest pin and website link.
Continuing my project to test how different boxed cakes (besides white or vanilla) taste when using the trick for making boxed cupcakes taste like bakery cupcakes, I attempted a chocolate fudge mix tonight. For this attempt, I used Betty Crocker's Chocolate Fudge cake mix and eliminated the vanilla (due to my spice cupcake trial with additional vanilla flavoring). These tasted okay -- but definitely lacked a rich, chocolate fudge flavor, likely due to all the extra ingredients (an additional egg and more butter). In the future, I would make these according to the package directions.
Verdict: FAIL.
Continuing my project to test how different boxed cakes (besides white or vanilla) taste when using the trick for making boxed cupcakes taste like bakery cupcakes, I attempted a chocolate fudge mix tonight. For this attempt, I used Betty Crocker's Chocolate Fudge cake mix and eliminated the vanilla (due to my spice cupcake trial with additional vanilla flavoring). These tasted okay -- but definitely lacked a rich, chocolate fudge flavor, likely due to all the extra ingredients (an additional egg and more butter). In the future, I would make these according to the package directions.
Verdict: FAIL.
Saturday, May 3, 2014
Day 123: Snickerdoodle Cake Pop (fail).
These did not taste good, mainly because the consistency was weird and squishy :(
Ingredients:
Yellow cake mix (baked according to box instructions)
Canned vanilla frosting (mine happened to be "hot pink vanilla!")
3/4 cup granulated sugar
3 tbsp ground cinnamon
lollipop sticks

Instructions:
Once cake has cooled, crumble it into fine pieces in a large bowl. Add 2 spoonfuls of frosting, incorporating it into the cake using your fingers (this looked like play dough to me...).
Once the frosting is evenly distributed, use a cookie scoop to make evenly-sized portions. Roll and shape the cake into balls. In a small bowl, combine sugar and cinnamon. Coat the cake balls in the cinnamon-sugar mixture. Serve as is, or add lollipop sticks to make cake pops.
This was my son's face prior to trying the cake pops...
Verdict: FAIL.
Thursday, May 1, 2014
Day 121: Cilantro Lime Dressing (fail).
Pinterest pin and website link.
This wasn't horrible, but it tasted pretty bland and was very runny; I could overwhelmingly taste the olive oil while eating the salad. I love cilantro lime dressings, so I'm still on the hunt for an amazing homemade one!
Ingredients:
1 cup loosely packed cilantro, stems removed and roughly chopped
1/2 cup plain Greek yogurt
2 tablespoons fresh lime juice (about 1/2 lime)
1-2 garlic cloves
1/4 cup olive oil
1 1/2 teaspoons white wine vinegar1/8 teaspoon salt
Instructions:
Puree all ingredients in a blender (I used my "Magic Bullet" blender) until smooth.
I then cut up all my veggies for a chopped salad -- romaine, corn, black beans, tomatoes, green onions and red peppers -- and poured the salad dressing on top.
Verdict: FAIL.
This wasn't horrible, but it tasted pretty bland and was very runny; I could overwhelmingly taste the olive oil while eating the salad. I love cilantro lime dressings, so I'm still on the hunt for an amazing homemade one!
Ingredients:
1 cup loosely packed cilantro, stems removed and roughly chopped
1/2 cup plain Greek yogurt
2 tablespoons fresh lime juice (about 1/2 lime)
1-2 garlic cloves
1/4 cup olive oil
1 1/2 teaspoons white wine vinegar1/8 teaspoon salt
Instructions:
Puree all ingredients in a blender (I used my "Magic Bullet" blender) until smooth.
I then cut up all my veggies for a chopped salad -- romaine, corn, black beans, tomatoes, green onions and red peppers -- and poured the salad dressing on top.
Wednesday, April 30, 2014
Day 120: Orange Julius Popsicles (success).
Pinterest pin and website link.
These tasted exactly like the original Orange Julius drink, and brought me right back to my junior high days of hanging out at the mall :)
Ingredients:
6 ounces (thawed) orange juice concentrate
1 cup milk
1 cup water
1/4 cup sugar
1 tsp vanilla
**When I was setting out my ingredients, I accidentally put out plain Greek yogurt too, but that's not included in this recipe.
Our Popsicle molds are missing in action -- and I don't have this awesome Zoku Quick Pop Maker (but may need to get one!) -- so I made some makeshift Popsicle holders with cups and straws taped together. It wasn't pretty, but it worked!
Instructions:
Whisk all ingredients together until well mixed. Pour into Popsicle molds (cups, in my case). To make my Popsicle sticks stand up (in my case, straws), I put tinfoil over the top and poked the straws through.
Verdict: SUCCESS!
These tasted exactly like the original Orange Julius drink, and brought me right back to my junior high days of hanging out at the mall :)
Ingredients:
6 ounces (thawed) orange juice concentrate
1 cup milk
1 cup water
1/4 cup sugar
1 tsp vanilla
**When I was setting out my ingredients, I accidentally put out plain Greek yogurt too, but that's not included in this recipe.
Our Popsicle molds are missing in action -- and I don't have this awesome Zoku Quick Pop Maker (but may need to get one!) -- so I made some makeshift Popsicle holders with cups and straws taped together. It wasn't pretty, but it worked!
Instructions:
Whisk all ingredients together until well mixed. Pour into Popsicle molds (cups, in my case). To make my Popsicle sticks stand up (in my case, straws), I put tinfoil over the top and poked the straws through.
I froze them for 4 hours, ran some warm water on the outside of the cup to remove the Popsicle, and...
...voila! They were funny-looking, but delicious!Verdict: SUCCESS!
Tuesday, April 29, 2014
Day 119: Homemade Au Jus without Pan Drippings (success).
Pinterest pin and website link.
Whenever we go out to eat, I always order a french dip sandwich if it is on the menu -- but I rarely think to make them at home because my favorite part is the au jus, and I don't like to use / make sauces from a package. This homemade au jus was excellent, and super easy to make without pan drippings; to make it into a meal, I just put some roast beef lunchmeat and cheese inside a sourdough roll, wrapped them in tinfoil, and threw them in the oven at 350 degrees while I waited for the au jus to finish.
Ingredients:
Olive oil (enough to saute onions)
1/4 cup red onion, chopped
1 teaspoon garlic, minced (I used jarred)
1/8 cup white wine (I used Pinot Grigio)
1 tablespoon Worcestershire sauce
2-1/2 cups beef broth
1 teaspoon flour
Instructions:
This made just enough au jus for my husband to have two sandwiches and me to have one. I will double or triple the recipe next time, and freeze the leftovers for easy dinners in the future!
Verdict: SUCCESS!
Whenever we go out to eat, I always order a french dip sandwich if it is on the menu -- but I rarely think to make them at home because my favorite part is the au jus, and I don't like to use / make sauces from a package. This homemade au jus was excellent, and super easy to make without pan drippings; to make it into a meal, I just put some roast beef lunchmeat and cheese inside a sourdough roll, wrapped them in tinfoil, and threw them in the oven at 350 degrees while I waited for the au jus to finish.
Ingredients:
Olive oil (enough to saute onions)
1/4 cup red onion, chopped
1 teaspoon garlic, minced (I used jarred)
1/8 cup white wine (I used Pinot Grigio)
1 tablespoon Worcestershire sauce
2-1/2 cups beef broth
1 teaspoon flour
Instructions:
- Caramelize the onions in the olive oil. Add garlic and cook for 1-2 additional minutes.
- Pour the chilled white wine and Worcestershire sauce into the pan, and cook for 1 minute.
- Add beef broth and bring to a light boil. Reduce heat and simmer for 30 minutes.
- Strain broth, throw out onions / garlic, and return broth to pot.
- Add flour and simmer 5 more minutes.
This made just enough au jus for my husband to have two sandwiches and me to have one. I will double or triple the recipe next time, and freeze the leftovers for easy dinners in the future!
Verdict: SUCCESS!
Monday, April 28, 2014
Day 118: How to Quickly Cube a Watermelon (success).
Pinterest pin and website link.
I won't be cutting a watermelon any other way from here on out -- this was so easy and fast!
Tip #1: I love all things Costco, with the exception of their 2-pack mini watermelons; I have never purchased a good one there, so I always shop elsewhere for my watermelon needs!
Start with a whole watermelon.
I won't be cutting a watermelon any other way from here on out -- this was so easy and fast!
Tip #1: I love all things Costco, with the exception of their 2-pack mini watermelons; I have never purchased a good one there, so I always shop elsewhere for my watermelon needs!
Start with a whole watermelon.
Cut in half.
"Peel" the rind off the watermelon by slicing from top to bottom.
Continue cutting all the way around and then slice off the top.
Cut the watermelon into slices.
Tip #2: your Superman (like mine) may prefer to eat his/her watermelon sliced like this instead of in cubes.
Cube.
Done!
Verdict: SUCCESS!
Subscribe to:
Posts (Atom)