Wednesday, April 30, 2014

Day 120: Orange Julius Popsicles (success).

Pinterest pin and website link.

These tasted exactly like the original Orange Julius drink, and brought me right back to my junior high days of hanging out at the mall :)

Ingredients:
6 ounces (thawed) orange juice concentrate
1 cup milk
1 cup water
1/4 cup sugar
1 tsp vanilla

**When I was setting out my ingredients, I accidentally put out plain Greek yogurt too, but that's not included in this recipe.
Our Popsicle molds are missing in action -- and I don't have this awesome Zoku Quick Pop Maker (but may need to get one!) -- so I made some makeshift Popsicle holders with cups and straws taped together.  It wasn't pretty, but it worked!

Instructions:
Whisk all ingredients together until well mixed.  Pour into Popsicle molds (cups, in my case).  To make my Popsicle sticks stand up (in my case, straws), I put tinfoil over the top and poked the straws through.
I froze them for 4 hours, ran some warm water on the outside of the cup to remove the Popsicle, and...
 ...voila!  They were funny-looking, but delicious!
Verdict: SUCCESS!

Tuesday, April 29, 2014

Day 119: Homemade Au Jus without Pan Drippings (success).

Pinterest pin and website link.

Whenever we go out to eat, I always order a french dip sandwich if it is on the menu -- but I rarely think to make them at home because my favorite part is the au jus, and I don't like to use / make sauces from a package.  This homemade au jus was excellent, and super easy to make without pan drippings; to make it into a meal, I just put some roast beef lunchmeat and cheese inside a sourdough roll, wrapped them in tinfoil, and threw them in the oven at 350 degrees while I waited for the au jus to finish.

Ingredients:
Olive oil (enough to saute onions)
1/4 cup red onion, chopped
1 teaspoon garlic, minced (I used jarred)
1/8 cup white wine (I used Pinot Grigio)
1 tablespoon Worcestershire sauce
2-1/2 cups beef broth
1 teaspoon flour
Instructions:
  • Caramelize the onions in the olive oil.  Add garlic and cook for 1-2 additional minutes.
  • Pour the chilled white wine and Worcestershire sauce into the pan, and cook for 1 minute.
  • Add beef broth and bring to a light boil.  Reduce heat and simmer for 30 minutes.
  • Strain broth, throw out onions / garlic, and return broth to pot.  
  • Add flour and simmer 5 more minutes.

This made just enough au jus for my husband to have two sandwiches and me to have one.  I will double or triple the recipe next time, and freeze the leftovers for easy dinners in the future!

Verdict: SUCCESS!

Monday, April 28, 2014

Day 118: How to Quickly Cube a Watermelon (success).

Pinterest pin and website link.

I won't be cutting a watermelon any other way from here on out -- this was so easy and fast!

Tip #1: I love all things Costco, with the exception of their 2-pack mini watermelons; I have never purchased a good one there, so I always shop elsewhere for my watermelon needs!  

Start with a whole watermelon.
Cut in half.
"Peel" the rind off the watermelon by slicing from top to bottom.
Continue cutting all the way around and then slice off the top.
Cut the watermelon into slices.
Tip #2: your Superman (like mine) may prefer to eat his/her watermelon sliced like this instead of in cubes.
Cube.
Done!
Verdict: SUCCESS!

Sunday, April 27, 2014

Day 117: Straw Bubble Wand (success).

Pinterest pin and website link.

This worked great!  Using a few items I already had at home, I made a bubble wand that my kids thought was better than the store-bought ones!

Materials:
Tape

7 straws (taped together)
Bubbles (we already had Super Miracle Bubbles, but you could make some at home)
Dip in bubble solution and start creating awesome bubbles!

Verdict: SUCCESS!

Saturday, April 26, 2014

Day 116: Jello Shaved Ice (success).

Pinterest pin and website link.

My kids loved helping me make this, and could barely contain their excitement for the 4+ hours it took to solidify before eating :)

Ingredients:
1 cup boiling water
2 cups Sprite or 7-Up
1 (4-ounce serving) package of Jello, any flavor

Instructions:
In an 8x8 glass pan, whisk the Jello package contents into the boiling water until dissolved.  Carefully stir in the soda (having a cute boy in charge of whisking is optional).
Freeze for at least 4 hours (I would suggest longer -- our batch was like shaved ice at the top and jello at the bottom after 4 hours, but after 6, was like shaved ice throughout).  Use an ice cream scoop to shave the ice.  Serve immediately.
Verdict: SUCCESS!

Friday, April 25, 2014

Day 115: Browning Ground Beef in a Crock-Pot (success).

Pinterest pin and website link.

I've never thought to brown my ground beef (or turkey / chicken) in the Crock-Pot, but I did it today and it worked great.  I thought the end taste with slow cooking was better than when I brown it on the stove; however, I don't think it saved me any time/energy since I needed to be home to stir the meat every hour or so.  I only browned 2 pounds of ground beef this time, but would use this method again when needing to brown a bunch of meat at a time (4+ pounds) since I don't have a pan big enough to do that on the stove!

Instructions: 
Put the raw meat in the Crock-Pot (I used a liner, but realized halfway through that with stirring the meat every hour, it was easier not to use one for this recipe), mash it a little to separate, cover, and cook on high for 4+ hours (mine took 5-1/2 to brown to my liking).  Stir every hour.
Done (at this point, I'd already taken half of the meat out to use in our dinner).
I used some in our dinner tonight, and then placed the rest in two freezer bags to freeze for upcoming meals.  Easy!

Verdict: SUCCESS!

Friday Favorite: "Lift and Peek" Teaching Clock.

Pinterest pin and website link.

My son is suddenly super interested in telling time, but is getting so frustrated when I try to teach him about the minute hand -- he just does not get it.  I made this clock today, and he was starting to catch on.  It was cute to see his little mind at work!  This was super easy to make using two paper plates, a Sharpie pen, one brad, two small pieces of paper, and some double-sided tape (to stick the two plates together in the center).
Verdict: SUCCESS!

Thursday, April 24, 2014

Day 114: Heart Manicure (success).

Pinterest pin and website link.

Even though Valentine's Day has already passed, I thought this was cute to try -- and it worked!  Instead of taking my own "how to" pictures, I decided not to reinvent the wheel and instead, simply borrowed the original blog author's photo below (website link above).

Materials: Toothpick, nail polish & a piece of tinfoil.
Instructions:
Pour a small amount of polish on a piece of tinfoil; refrain from using a quick-dry polish, as it will get sticky very quickly.  Let the polish sit for one minute to thicken up just a little bit, which will make it easier to work with.  Using a toothpick dipped in polish, make a dot on the nail.  Make a second dot next to that.  Using the toothpick tip, drag one of the dots down at a 45-degree angle.  Drag the other dot down at a 45-degree angle to meet the other side.

My finished nail -- I love it!
Verdict: SUCCESS!

Wednesday, April 23, 2014

Day 113: Reuse DVD Case into Mini White Board (success).

Pinterest pin and website link.

I recently did a DVD re-organization that involved placing all of our DVDs into sleeves for compact storage, which left me with tons of old DVD cases.  This turned out to be a cute idea for the kids -- and would be handy on long car trips for entertainment!

Materials:
Old DVD case
Piece of card stock
Dry-erase markers
A glove (or sock)

Instructions:
I simply measured and cut to size a solid-color piece of card stock, slipped it into an old DVD case, let the kids color with dry-erase markers to their hearts' content, and then showed them how to simply erase with the glove and start over.  The glove fits perfectly inside the DVD case for storage, although I'm on the hunt for smaller dry-erase markers that will also fit easily inside the case.
Verdict: SUCCESS!

Tuesday, April 22, 2014

Day 112: Baby Powder to Untangle Necklace (fail).

Pinterest pin and website link.

Although I was eventually able to untangle this necklace using baby powder, I tried untangling another knot in the same necklace without it and didn't find that using baby powder made it any easier...

Instructions:
Sprinkle a little baby powder over the knot to help loosen it, then use a pin to finish freeing it.


Verdict: FAIL.

Monday, April 21, 2014

Day 111: Taco Tator Tot Bake (success).

Pinterest pin and website link.

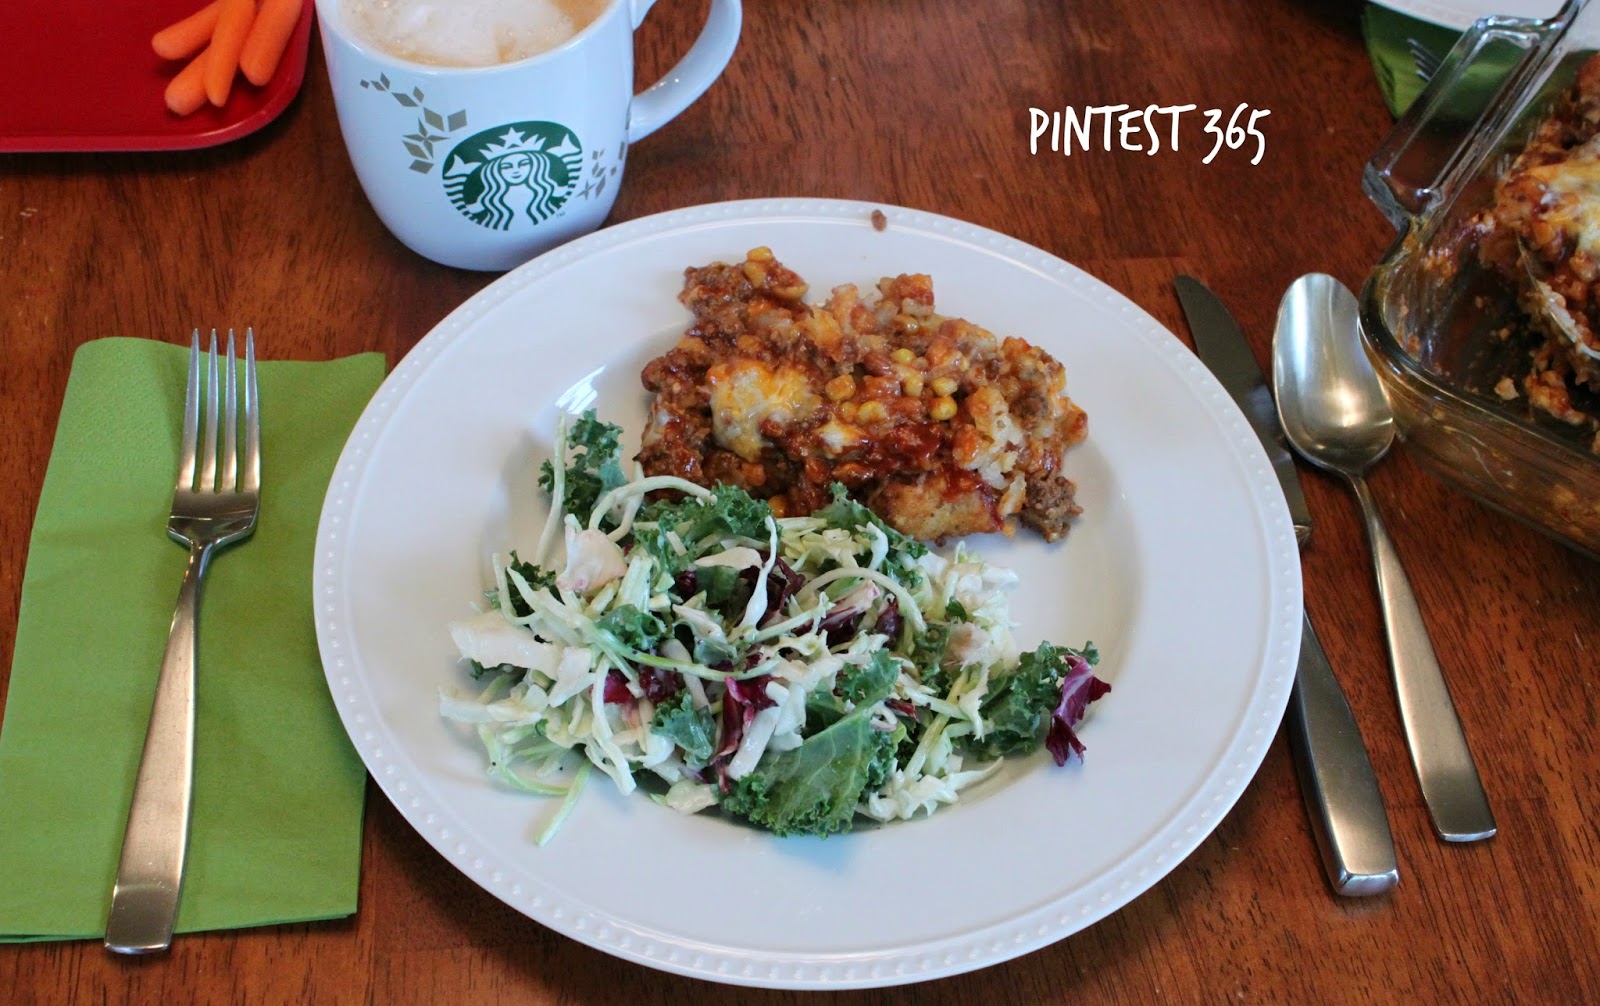
This wasn't the healthiest meal to make my family -- and I was hoping that I would report back that I didn't really like it because of that reason.  However, that would be a lie.  My husband and I loved it; our kids, on the other hand, tried a taste and spit it out.  Hey, at least they didn't consume a bunch of tator tots, cheese and ground beef.  I mean, seriously -- what is wrong with them?!  What is there not to love about those ingredients mixed together?

Ingredients:
1 lb ground beef
1 small onion, diced (I used onion spice, as I didn't have an actual onion)
3 garlic cloves, minced
1 package of taco seasoning (1/4 cup of my large taco seasoning container)
1 (16 oz) bag frozen corn (I used a can of corn instead)
1 (4 oz) can green chiles, diced / drained (I didn't have this ingredient, but used spicy beans below)
1 (12 oz) can black beans, drained (I had a can of hot chili beans, which I used instead and didn't drain)
2 cups shredded Mexican cheese
1 (16 oz) package frozen tator tots (half my large bag)
1 (10.5 oz) can red enchilada sauce
Instructions:
Preheat oven to 375 and lightly grease a 9x13 baking dish. 

Heat a skillet to medium high heat. Add in ground beef, onion, and garlic. Cook until meat is brown and onion is tender. Drain fat. 

Add in taco seasoning, corn, green chiles, and beans. Cook until heated through. 

In a large bowl, combine the meat mixture, 1 cup cheese and tater tots. Mix until combined.

Pour about 1/3 of the enchilada sauce on bottom of 9x13 baking dish. Add in tater tot & meat mixture and smooth out in the pan. Pour remaining enchilada sauce on top.  

Bake in preheated oven for 40 minutes. During the last few minutes, sprinkle remaining cheese on top of dish and cook until melted. Serve warm.
And yes, I am weird and I ate this with a coffee for dinner, and it actually wasn't a bad combo!

Verdict: SUCCESS!

Sunday, April 20, 2014

Day 110: Bunny Handprint Art (success).

Pinterest pin and website picture.

Happy Easter!  In honor of the day, we tried a hand-print bunny craft.  I'm a sucker for crafts with my kids hands or feet on them :)

Materials needed:
Washable paint

Paintbrush
Markers
Paper

Instructions:
Spread white paint over kids' hands, except for the thumb.  Stamp their hand on a colored piece of paper (attempting to have them do the Star Trek "Vulcan salute").  Let it dry and paint the ears, nose and eyes.
First attempt -- we didn't use enough pressure when we "stamped" her hand on the paper:
Second attempt:
 Done!
Verdict: SUCCESS!

Saturday, April 19, 2014

Day 109: Homemade Pumpkin Pie Spice (success).

Pinterest pin and website link.

I had a can of pumpkin in my pantry and wanted to try making pumpkin pie refrigerator oatmeal for my pumpkin-loving husband.  However, the recipe calls for pumpkin pie spice, which I didn't have.  Luckily, I had all the spices already in my cupboard to make my own!

Ingredients:
2 tablespoons ground cinnamon
1 tablespoon ground ginger
2 teaspoons ground nutmeg
1/2 teaspoon allspice
1/2 teaspoon ground cloves
Instructions:
Whisk together the spices in a small, air-tight container with a lid.  

Yields about 1/4 cup of pumpkin pie spice.

This worked perfectly, and my husband loved the new flavor of refrigerator oatmeal; I still like the blueberry one best!

Verdict: SUCCESS!

Friday, April 18, 2014

Day 108: Removing Price Sticker Residue (success).

Pinterest pin and website link.

This worked just as described!  First, peel off as much of the price sticker as you are able to with your fingers.  Then, using non-acetone nail polish remover (it must be NON-acetone) on a cotton ball, rub the remaining sticker until the residue is removed.  I had to rub pretty hard (plus use my fingernails at times) to get it all to come off.

Price sticker residue on plastic:
Removed!
Price sticker residue on hardcover and board books:
Removed from hardcover book!
Removed from board book!
(Although, just as she warned, some of the board book color came off with the sticker -- there was no way to get that sticky residue off without me pressing hard enough to take off some of the color too).
Verdict: SUCCESS!

Friday Favorite: Liquid Laundry Detergent Container into Bubble Refill Dispenser.

Pinterest pin and website picture.

I just mixed up a new batch of homemade bubble solution and poured it into this liquid laundry detergent container.  My kids can't wait until tomorrow (when the bubble solution settles enough to create awesome bubbles) to help themselves to more bubbles whenever they are running low!
Verdict: SUCCESS!

40 Bags in 40 Days: Week 5 Update.

This project is finished, and it feels good to have gotten so many things out of my house!  I didn't keep track of how many bags total I cleaned out of the house -- and although I don't think it was close to 40 bags of items to trash, consign and donate -- it feels great to have cleaned out 40 areas!

31. Master closet organization (I didn't want to spend the money on a dresser, plus I already had these bins, so I just added labels and now I feel organized!):
32. Outside toys:
33. Painting supplies:
34. Pantry:
35. Master bathroom cabinets:
36. Bedside table:
37. Husband's white socks and t-shirts (I basically just threw away everything he had and bought new!):
38. Birthday party prep bin (these items were randomly stashed throughout the house):
39. Kids' bathroom cabinets:
40. Random kid gifts (purchased on sale, and now safely hidden for birthday party gifts or birthday / holiday presents for my kids)
Done!

Verdict: SUCCESS!